Logic & flow control
Logic and flow-control steps let you direct how an automation moves through its workflow — branching on conditions, pausing for the right moment, skipping ahead, or stopping early.
Complex workflows get hard to read. See Navigating the automation canvas for the step search, step references, and minimap tools that help you find your way around a large automation.
If/else branches
The If/Else step splits your workflow into two paths based on whether a condition is met.
Set up an if/else step
When adding a new step, select If/Else from the options:

You will be prompted to define a filter:
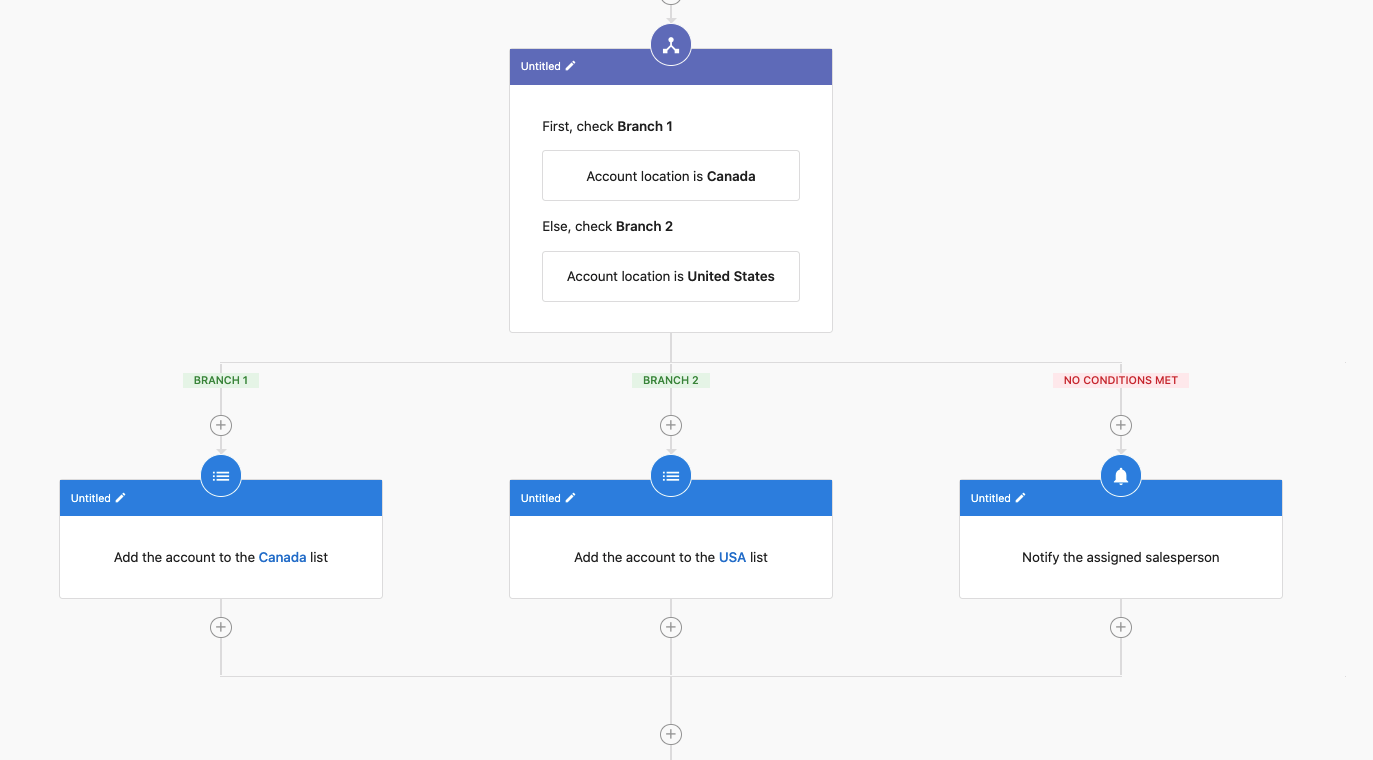
After setting up your condition, the workflow shows two branches:
- If branch: This path is followed when the condition is true
- Else branch: This path is followed when the condition is false
You can add different steps to each branch to create custom pathways based on your filter conditions.
Common use cases for if/else
- Contact qualification — Determine if a lead meets your criteria and end the automation for unqualified leads
- Multi-path communication — Send different follow-up emails based on customer responses and end the automation when a desired outcome is achieved
- Time-sensitive processes — End automations for contacts who haven't responded within a specified timeframe
End this automation
The End This Automation step terminates an automation at a specific point. This is useful when you've completed the necessary steps for some records and don't need to continue processing.
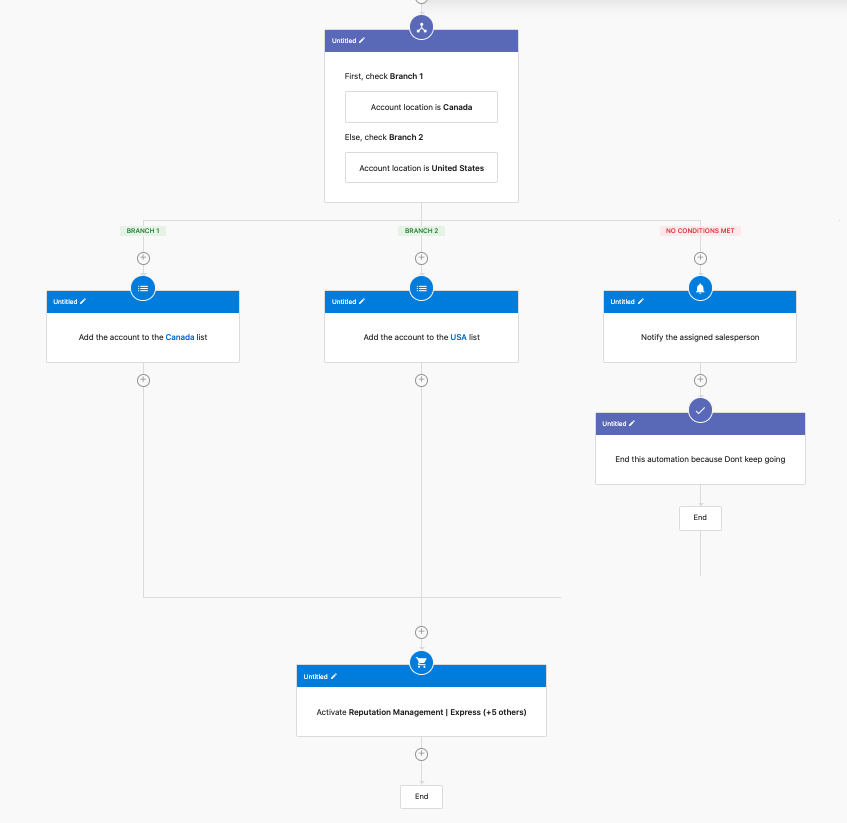
Using this step along with if/else conditions gives you significant control over the automation flow. For example, you can terminate the automation early for certain leads while continuing the process for others based on specific criteria.
Delay steps
Fixed delay
The Delay step pauses the automation for a set amount of time (minutes, hours, or days) before proceeding to the next step. Find it under the Delays category in the step editor.
Delay until an event happens
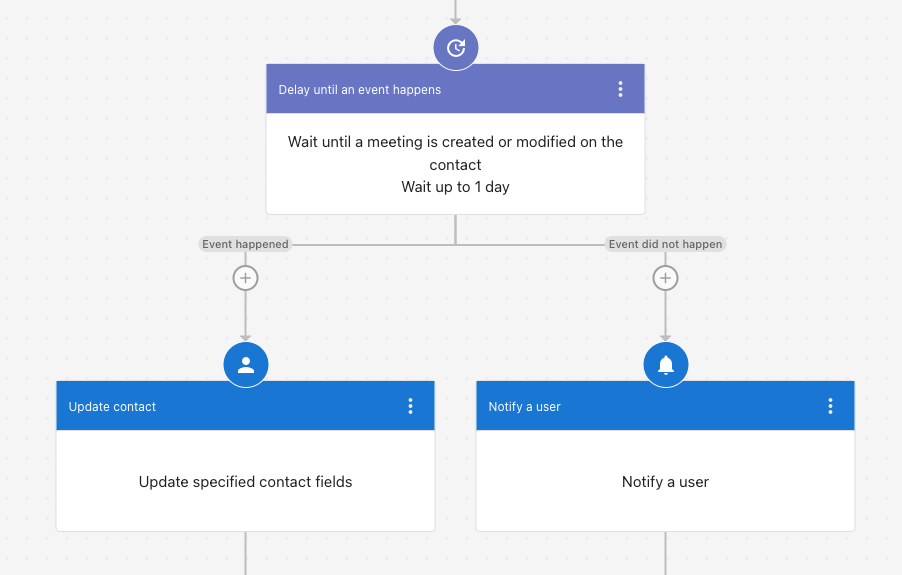
The Delay Until step pauses the automation and waits until a specific event occurs in the CRM, giving you precise timing control.

Set up a delay until step
- Navigate to the Automation Workflow Editor within your CRM
- Add a Delay Until step at the appropriate point in the workflow
- Choose a delay period or specify an event that must occur before proceeding to the next step
- Save and activate the workflow
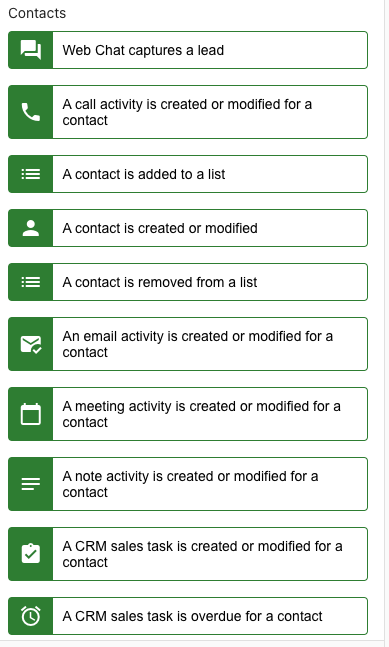
Available delay until options
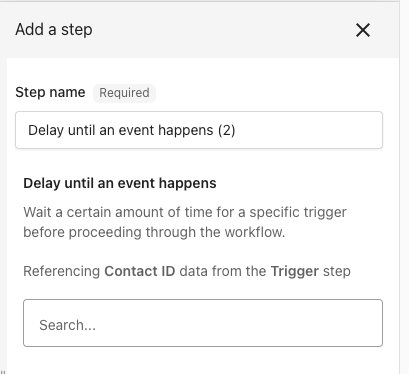
- Name of the action: Delay until an event happens
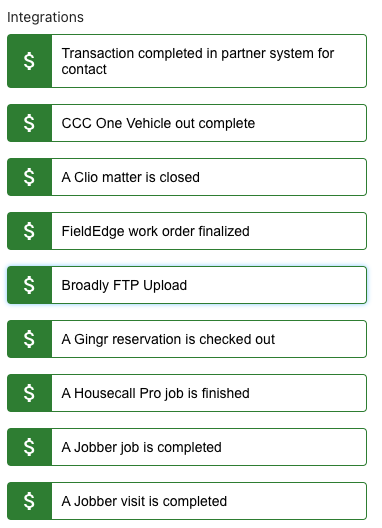
- List of sub-triggers currently available for a contact:
Benefits of delay until steps
- Improved workflow precision — Ensures that automated tasks happen at the optimal moment
- Better customer engagement — Delays help optimize messaging and follow-up timing
- Enhanced sales process management — Enables better tracking of missed sales touch points and notifications
Use case example
A business wants to automate follow-ups for new contacts generated via web chat. The workflow includes:
- AI-generated thank-you email upon contact creation
- A plain text email sent to the contact
- A CRM sales task created for follow-up
- A Delay Until step to wait a set period before creating an opportunity
- A note added to the contact after the delay period
By implementing a Delay Until step, the business ensures timely and meaningful engagement rather than immediate, potentially ineffective, actions.
Jump to a step
The Jump to a step action sends the automation forward or backward to a different step in the workflow. Find it under the Conditions category in the step editor.
Common uses:
- Retry loops — Jump back to a check step every few hours until a condition is met
- Skip ahead — Jump past steps that don't apply based on earlier conditions
Be careful with backward jumps — without an exit condition (like an if/else that ends the automation), you can create an infinite loop.
Rate filter
The Rate filter step limits how many entities pass through per time period. Find it under the Conditions category in the step editor.
Use this when you need to throttle actions — for example, limiting notification emails to 10 per hour or pacing API calls to avoid rate limits on an external system.
A/B branch (Early Access)
The A/B branch step splits automation runs between two paths, letting you test which approach performs better. Find it under the Workflow category in the step editor.
Use this to test different messaging, different action sequences, or different timing to see which path produces better outcomes.
Best practices
- Plan your logic flow — Before implementing if/else steps, map out all possible paths your automation might take
- Use meaningful delays — Choose delay periods that make sense for your customer journey and business processes
- Test complex branching — Always test advanced automations thoroughly before deploying to production
- Add exit conditions — When using jump steps for loops, always include a way to break out
Related pages
- Data expressions — Extract and transform data between steps
- Actions overview — All available action steps
- Triggers overview — What starts your automation