The Get started learning path sequences your first-week setup: the platform, branding, accounts, your team, and getting paid.
Task Manager Projects
Task Manager is Vendasta's tool to help fulfillment teams track and communicate the work they are doing for customers, and its flexibility and customization allow for a variety of workflows, all while fitting into Vendasta's infrastructure for ordering and reporting.
This guide will focus on using projects in Task Manager. Projects are an easy way to get started and allow for a lot of flexibility, no matter the work that's being done. Whether you're using an existing process that your team has used for years or you're starting something new from the ground up, Task Manager Projects can be the tool for you!
Getting Started Checklist
Cover the basics
Add your team
Digital Agent is the role you want to give your team members to allow them to access Task Manager. To add team members, take the following steps:
- Go to
Partner Center→Administration→ My Team. - Click Invite team member.
- Enter a name and email address for the team member.
- Select a role(s) for the team member.
- Be sure to select Digital Agent, but you can add more roles if you choose.
- Select which permissions the team member should have.
- Click Send.
Navigation basics
To open Task Manager, go to Partner Center → Fulfillment → Open Task Manager.
To find your unique Task Manager login URL (for Digital Agent users to log in directly), navigate to Partner Center → Fulfillment → Users.

Here are the main sections to be aware of:
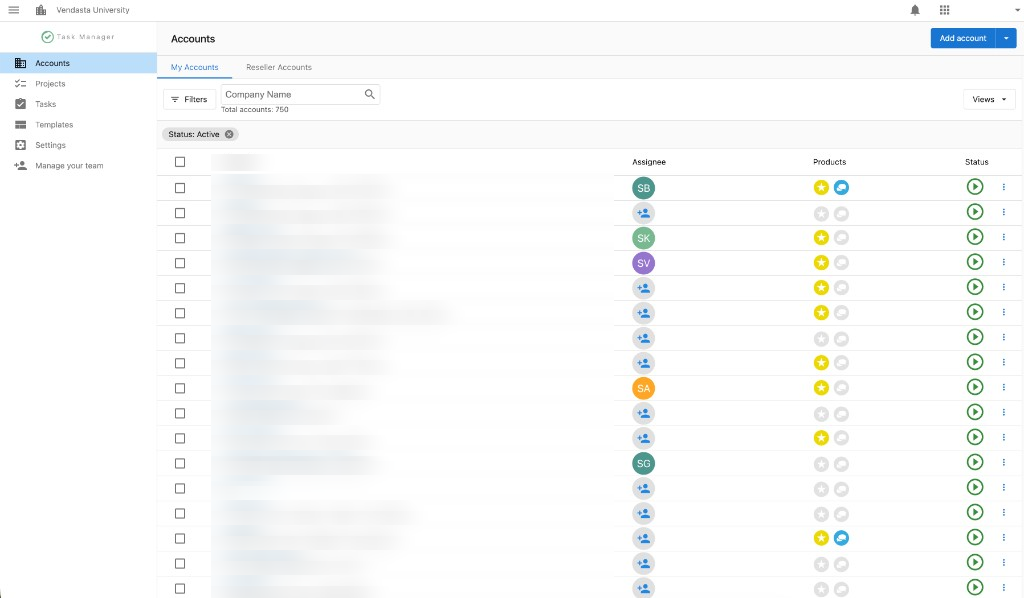
Accounts: Unlike the Accounts section in Partner Center, this section shows only accounts that have tasks or projects associated with them.
Projects: The focus for this guide, projects are a collection of tasks. Typically, they represent the unit of work that your team is completing for a customer (eg. a Website Build, or a Customer Onboard for example). The Projects tab shows all of the open and completed projects for your entire team.
Tasks: The individual pieces of work that your team is completing for a customer. Projects are made up of tasks, but tasks can also be created as standalone items. This section allows you to view all of the tasks across your team.
Templates: Pre-built projects that can be manually or automatically created as needed.
Settings: Adjust the settings for task generation, statuses, and more.
Manage your team: Takes you back to Partner Center's My Team page, where you can add and manage your team members.
Create a template
Basic template
- Go to
Task Manager→Templates. - Click + Add New Template and select the type of template you want to create:
- Project: a multi-step project template.
- Task: a single task template.
- Select from library: choose from pre-made library options.
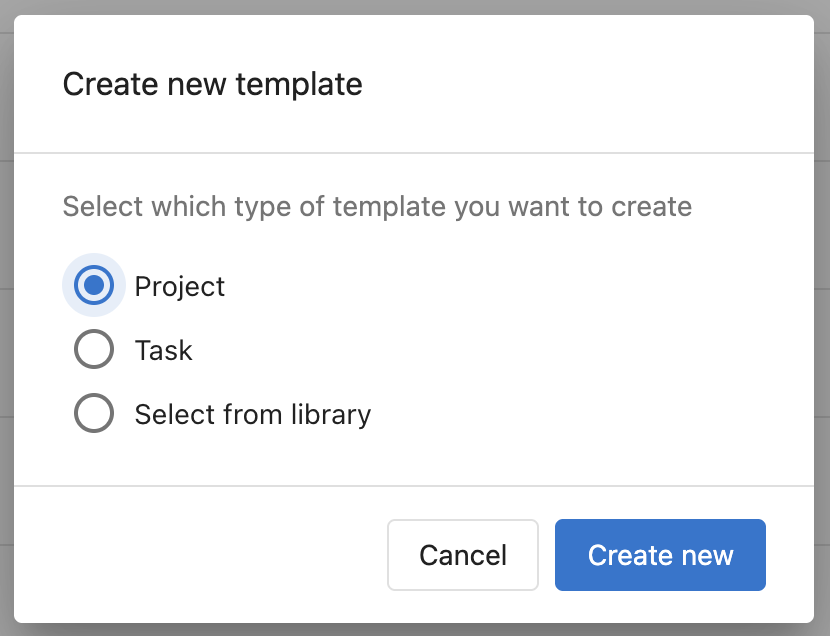
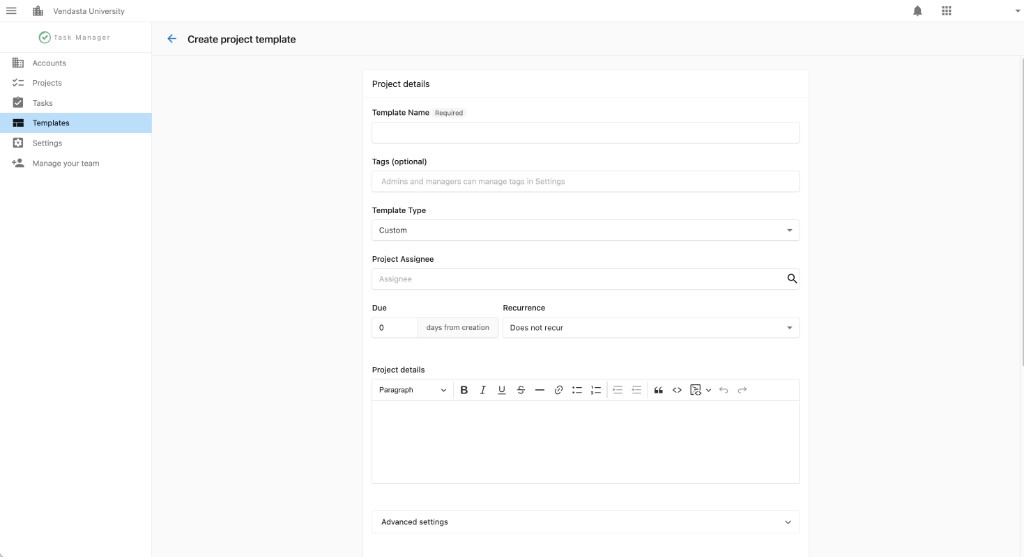
- Fill in the project details:
- Template Name (required): the name of your template.
- Tags (optional): admins and managers can manage tags in Settings.
- Template Type: choose from the available template types (e.g. Custom).
- Project Assignee: who the template will be assigned to by default.
- Due __ days from creation: the number of days the project is due after creation.
- Recurrence: how often the project recurs (e.g. Does not recur).
- Project details: a rich text field for additional project information.
- Advanced settings: expand for additional configuration options.
- Create the tasks associated with the project. Here, you can set the following fields:
- Task Name: what the task is called.
- Assignee: who the task will be assigned to when created.
- Due __ days from creation: how soon after the project is created the task is due.
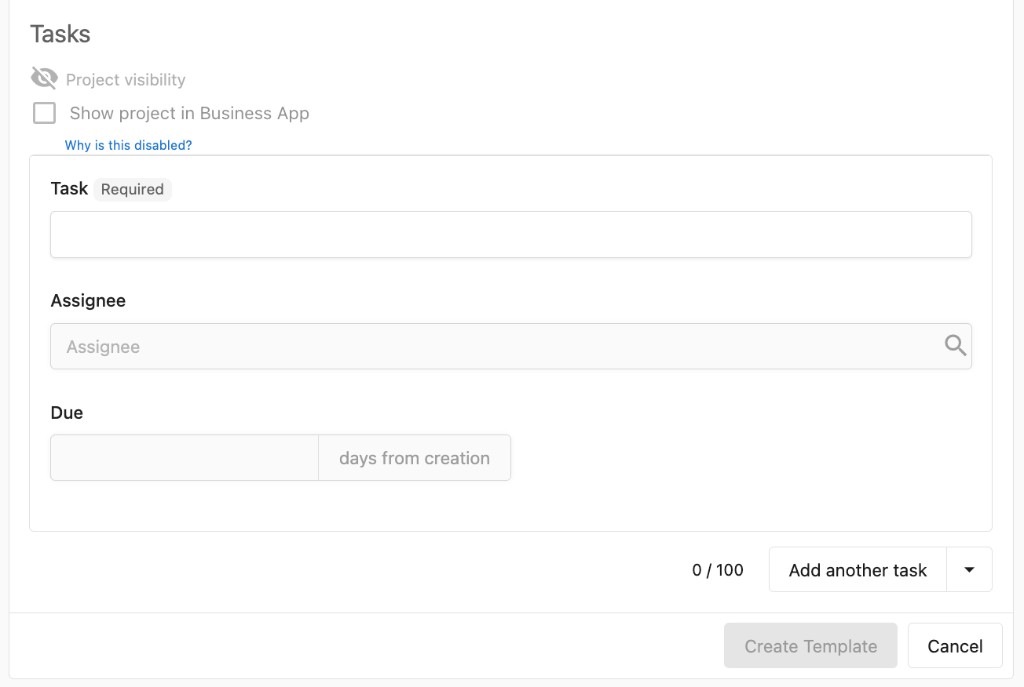
You can add new tasks by selecting Add Another Task. You can delete tasks by selecting Delete Task.
- Click Create Template.
Advanced template features
There are several advanced features available when creating a template.
Advanced settings for projects
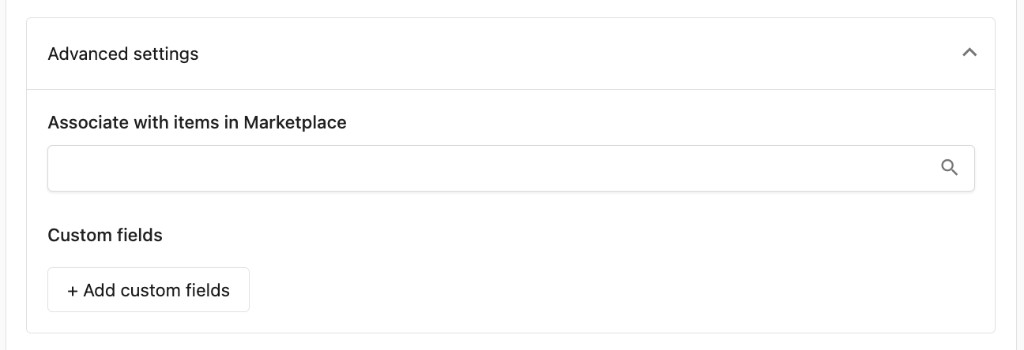
Clicking into the advanced settings in the main project configuration section while creating a template reveals:
- Custom fields: Click + Add custom fields to create additional fields for your template.
Advanced settings for tasks
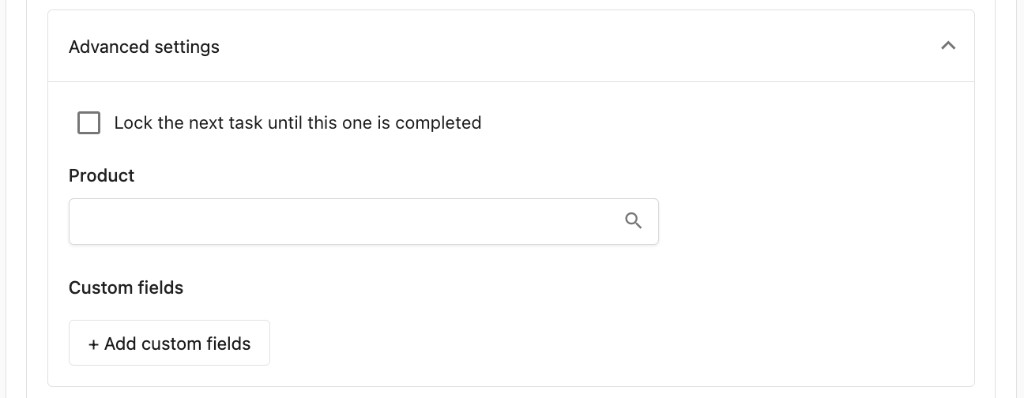
When adding tasks to a project, there are advanced settings available as well. Expand Advanced settings on a task to access:
- Lock the next task until this one is completed: when you have two or more tasks in a project template, check this option to prevent the next task from being acted upon until the current one is completed. When a task is locked, its due date is based on when it is unlocked rather than when the project is created.
- Product: link a Vendasta Marketplace product (e.g. Reputation AI, WordPress Hosting) to the task. This creates a shortcut inside the task so your team can access the product directly in your customer's Business App.
- Custom fields: click + Add custom fields to create additional fields for the task.
Generate your project
There are three ways that you can create a project from a template: manually, through product activation, and through an automation.
Manual
- Go to
Task Manager→Projects. - Click Create project in the top right corner.
- From here you can either:
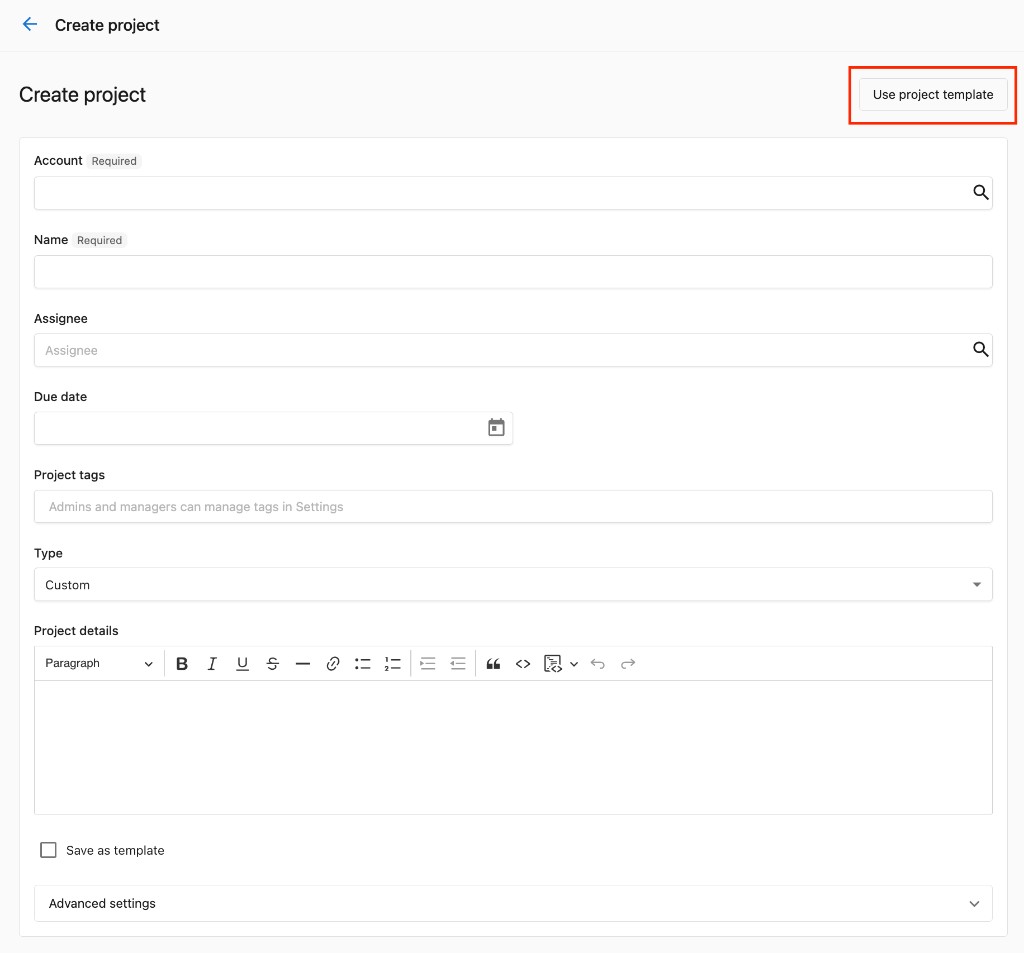
- Create a one-off project by filling in the fields directly (Account, Name, Assignee, Due date, Project tags, Type, and Project details).
- Use a project template by clicking Use project template in the top right corner and selecting a saved template.
- Search and select an account from the Account field.
- Make any adjustments to the project or tasks as needed.
- Scroll to the bottom and click Create project.
Product activation
You can generate a project from a template every time that you activate a Marketplace product of your choosing. When creating or editing a task within a project template, you can follow these steps:
- On a task, click Advanced settings.
- Under Associate with items in the Marketplace, search and select the product of your choice.
- Scroll down to the bottom and save or update the template.
With a Marketplace product selected, every time that you activate this product for an account, the project will be launched in Task Manager for that account.
Automation
- Go to
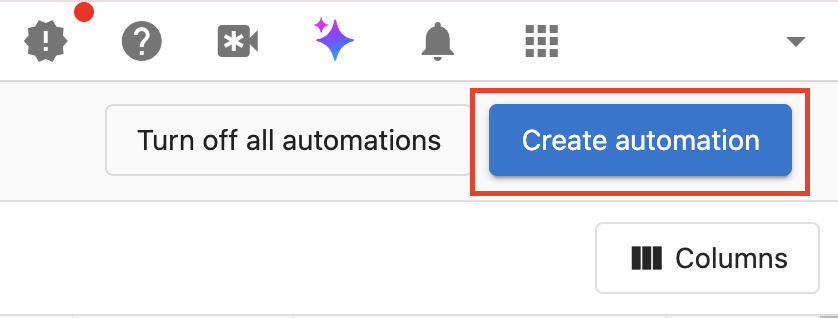
Partner Center→Automations→My automations. - Click Create automation in the top right corner.
- You'll be redirected to the Automation templates page, where you can browse templates organized by:
- Recommended for you, Recently added, and Popular sections.
- Function, Objective and Featurecategories in the left sidebar.
- To create a new automation from scratch, click Blank.
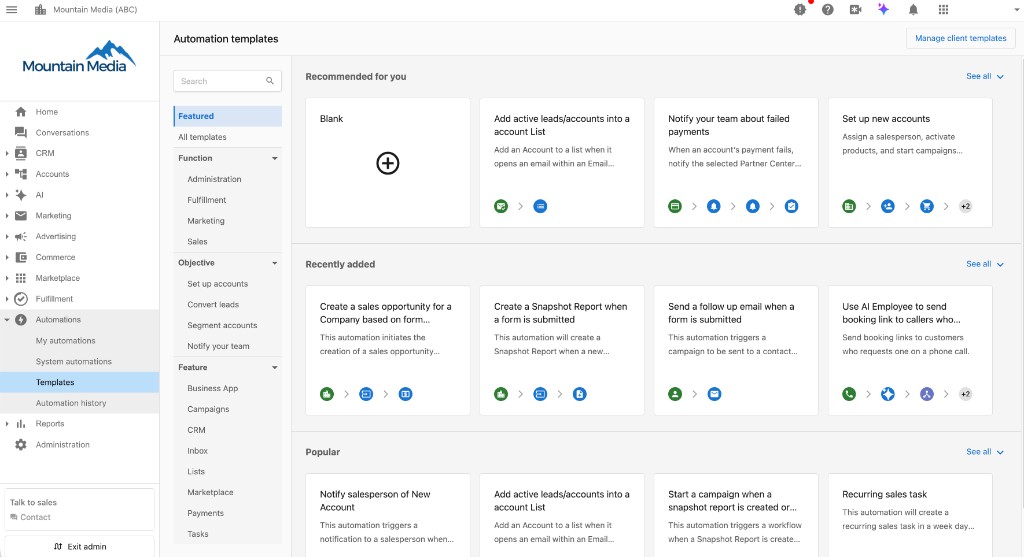
- Select whatever trigger condition you desire to start the automation.
- Within the automation, choose Create a fulfillment project for the account.
- Turn the automation on.
Manage your projects
General overview
Once you have projects created, there are several powerful ways to track them. The video above walks through several of these. Here are the main points to take away:
Account view: When accessing an account, you'll be able to see all projects and tasks associated with that account. This allows you to quickly see everything happening for a specific customer.
Projects page: This is the main way to view your projects. Here you can create views (eg. "Overdue by assigned to", "Upcoming due projects for account X", etc) to easily group and monitor the status and due dates of your projects.
Inside projects: Adding comments, attachments, updating statuses, and using the Due Date Estimator are all ways to efficiently manage your projects once they're created.
Sharing projects in Business App
Projects can be shared to Business App, so your customers can be kept up to date on the active projects that are being worked on for them. When editing or creating a project, check Show project in Business App under Project visibility in the Tasks section.
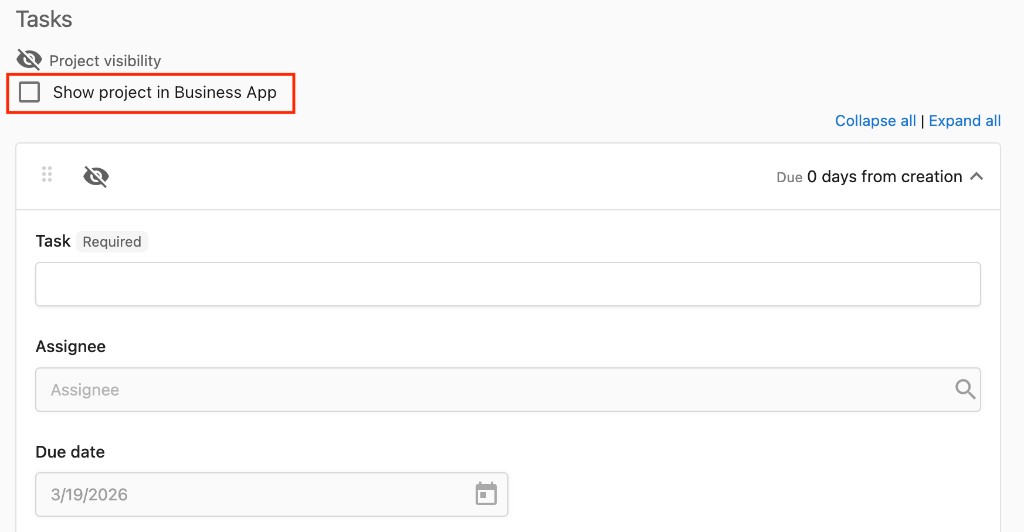
If you enable this, your customer will be able to see the entire project timeline including all tasks in the project, as well as any public comments in the tasks. Take care to ensure all information is appropriate to be shared with your customer.