How do I create marketing emails?
You create marketing emails in the Email Builder and send them through Campaigns, at Marketing → Campaigns in Partner Center, for scheduled drip sequences, or through Automations for trigger-based delivery.
Overview
The process of creating marketing emails involves:
- Designing your email content using the Email Builder
- Adding dynamic personalization with contact and company data
- Deploying through campaigns (drip sequences) or automations (advanced conditional workflows)
- Testing and optimizing performance
What's the difference between campaigns and automations?
Campaigns are drip-style marketing automation that send scheduled email sequences to your audience. They're ideal for straightforward, time-based email marketing.
Automations are advanced, intelligent workflows that support both drip sequences AND conditional logic based on contact actions, business events, and data changes. They provide more sophisticated targeting and personalization capabilities.
How do I use the Email Builder?
The Email Builder allows you to design engaging emails that look great on any device. With the Email Builder you can quickly create effective email campaigns utilizing all available data points while optimizing for various devices with instant visual feedback.
Why the email builder is important
With upwards of 80% of emails opened on mobile devices, it's crucial to ensure your emails display properly across all devices. The Email Builder provides instant visual feedback so you can see exactly how your emails will appear to recipients.
Customize your logo
Use this feature to hide or customize the logo for each email you design. The logo can be hidden or changed for each different email inside your campaigns, allowing for more personalized content.
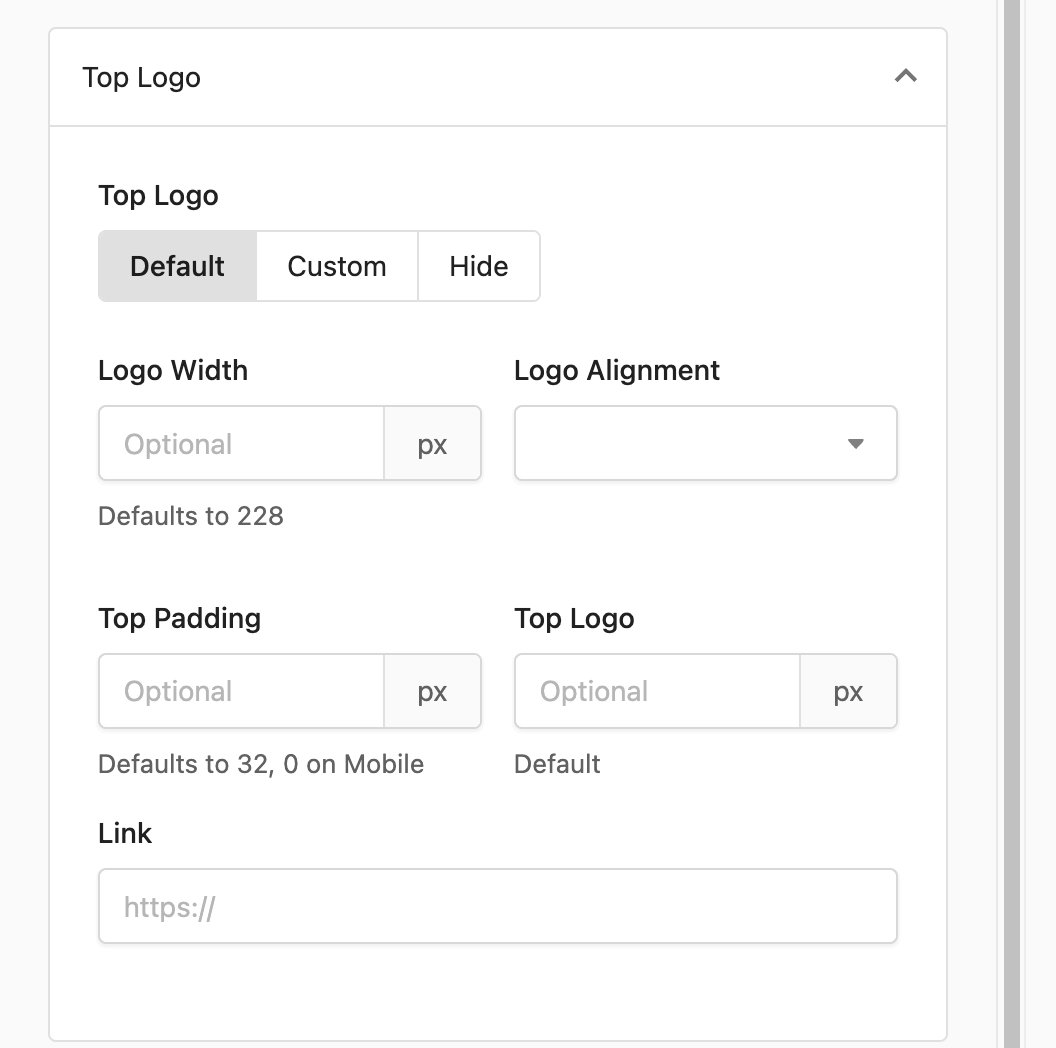
The logo customization block has three options:
- Default: Uses the partner logo configured in your branding settings.
- Custom: Upload a different image. You can set the width and alignment, and add a URL so clicking the logo takes recipients to a destination of your choice.
- Hide: Removes the logo from this email entirely.
Adjusting padding between content blocks
If you have two images stacked on top of each other and there's an unwanted gap between them, it's caused by the default padding on each block. To remove the gap:
- Click the upper block to select it.
- In the block settings panel, set Bottom Padding to
0. - Click the lower block to select it.
- Set Top Padding to
0.
This eliminates the space between the two blocks. The same approach works for any adjacent blocks where you want tighter spacing.
Working with content blocks
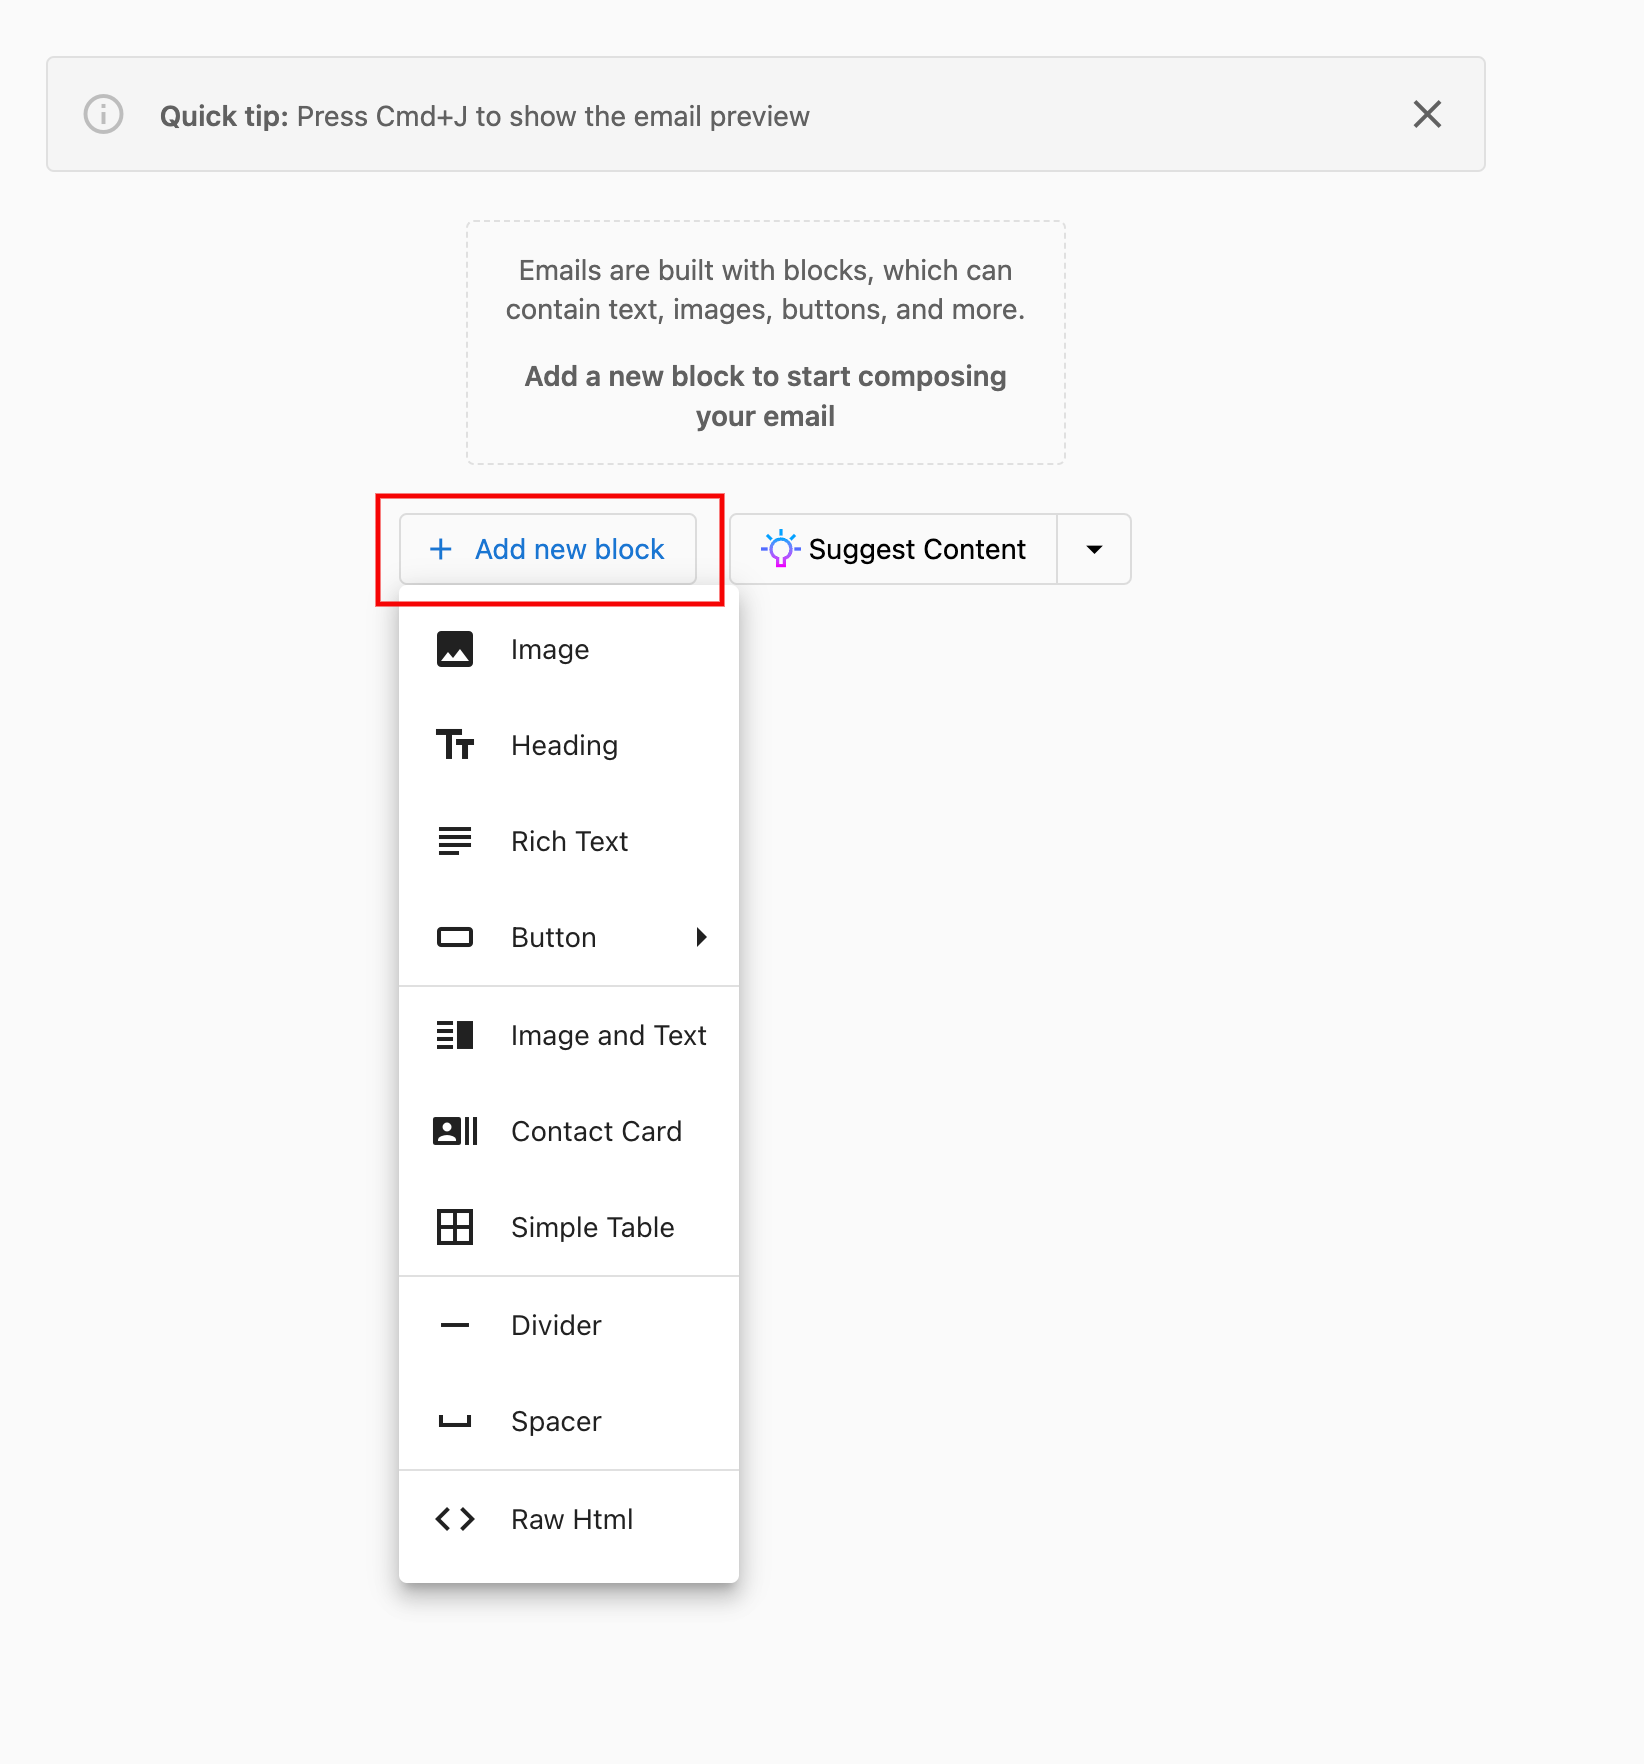
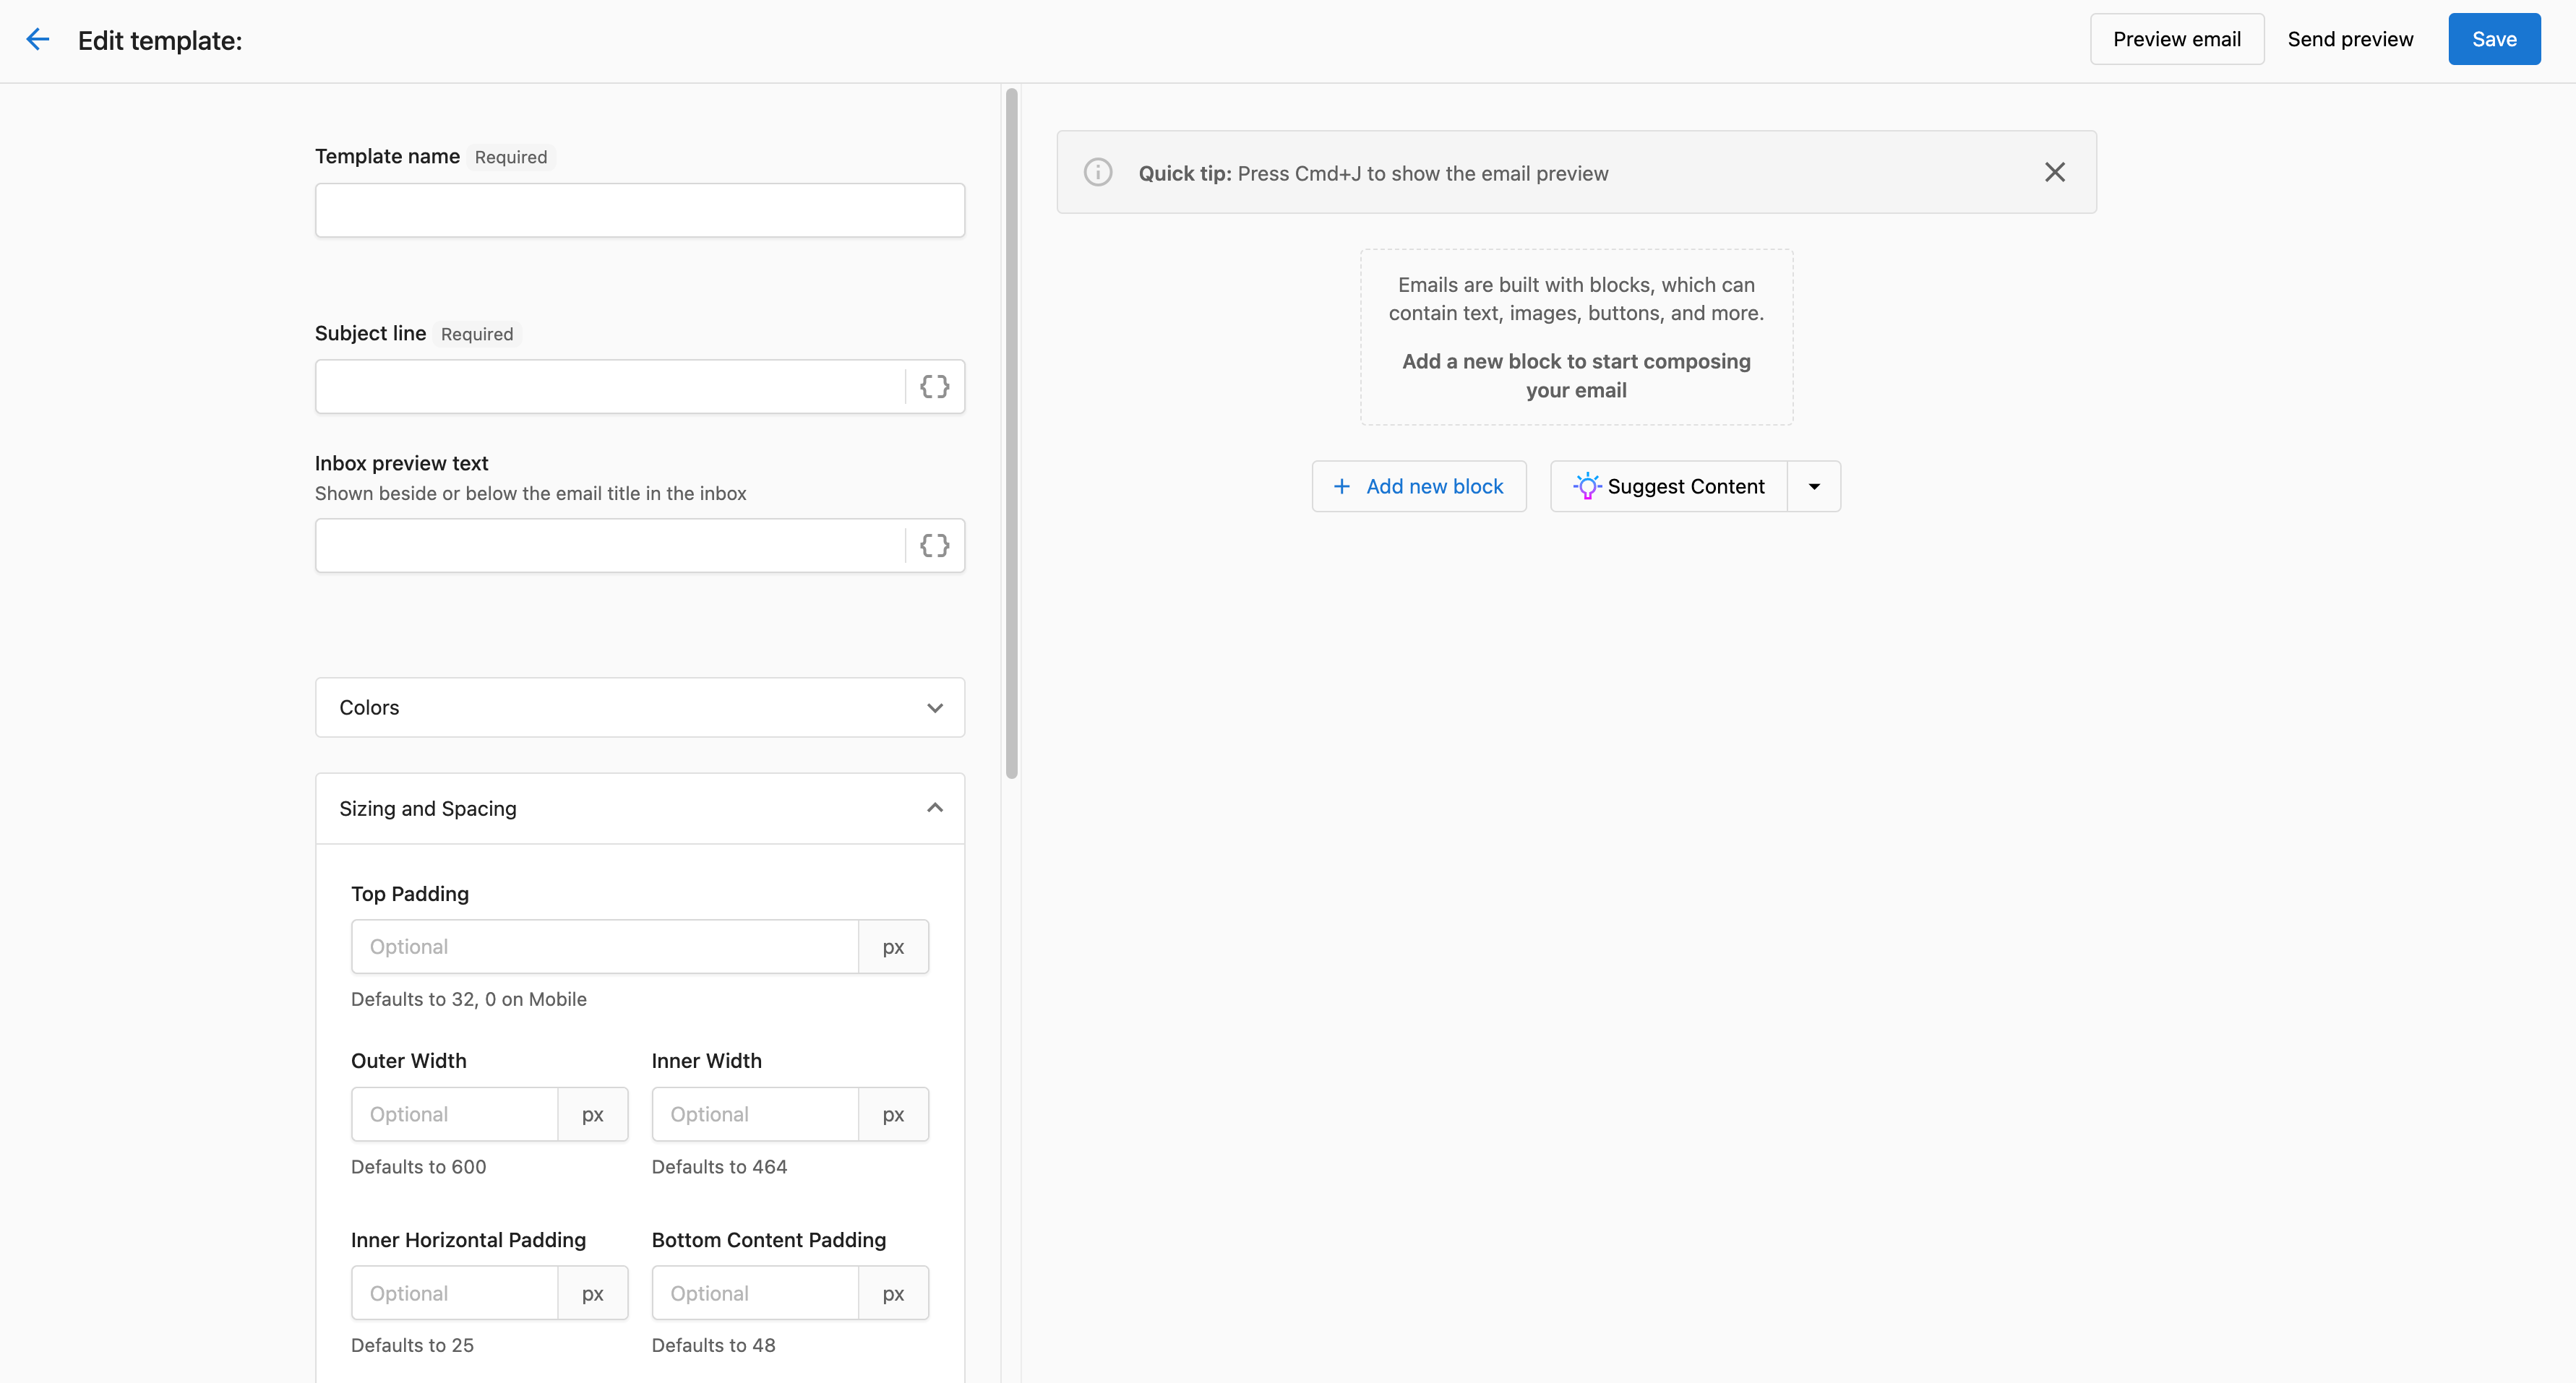
All email content is placed in content "blocks." Email Builder provides multiple blocks that you can click and add. The blocks determine what kind of content can be entered as well as the styling and editing options available. Click +Add new block to start building your email.
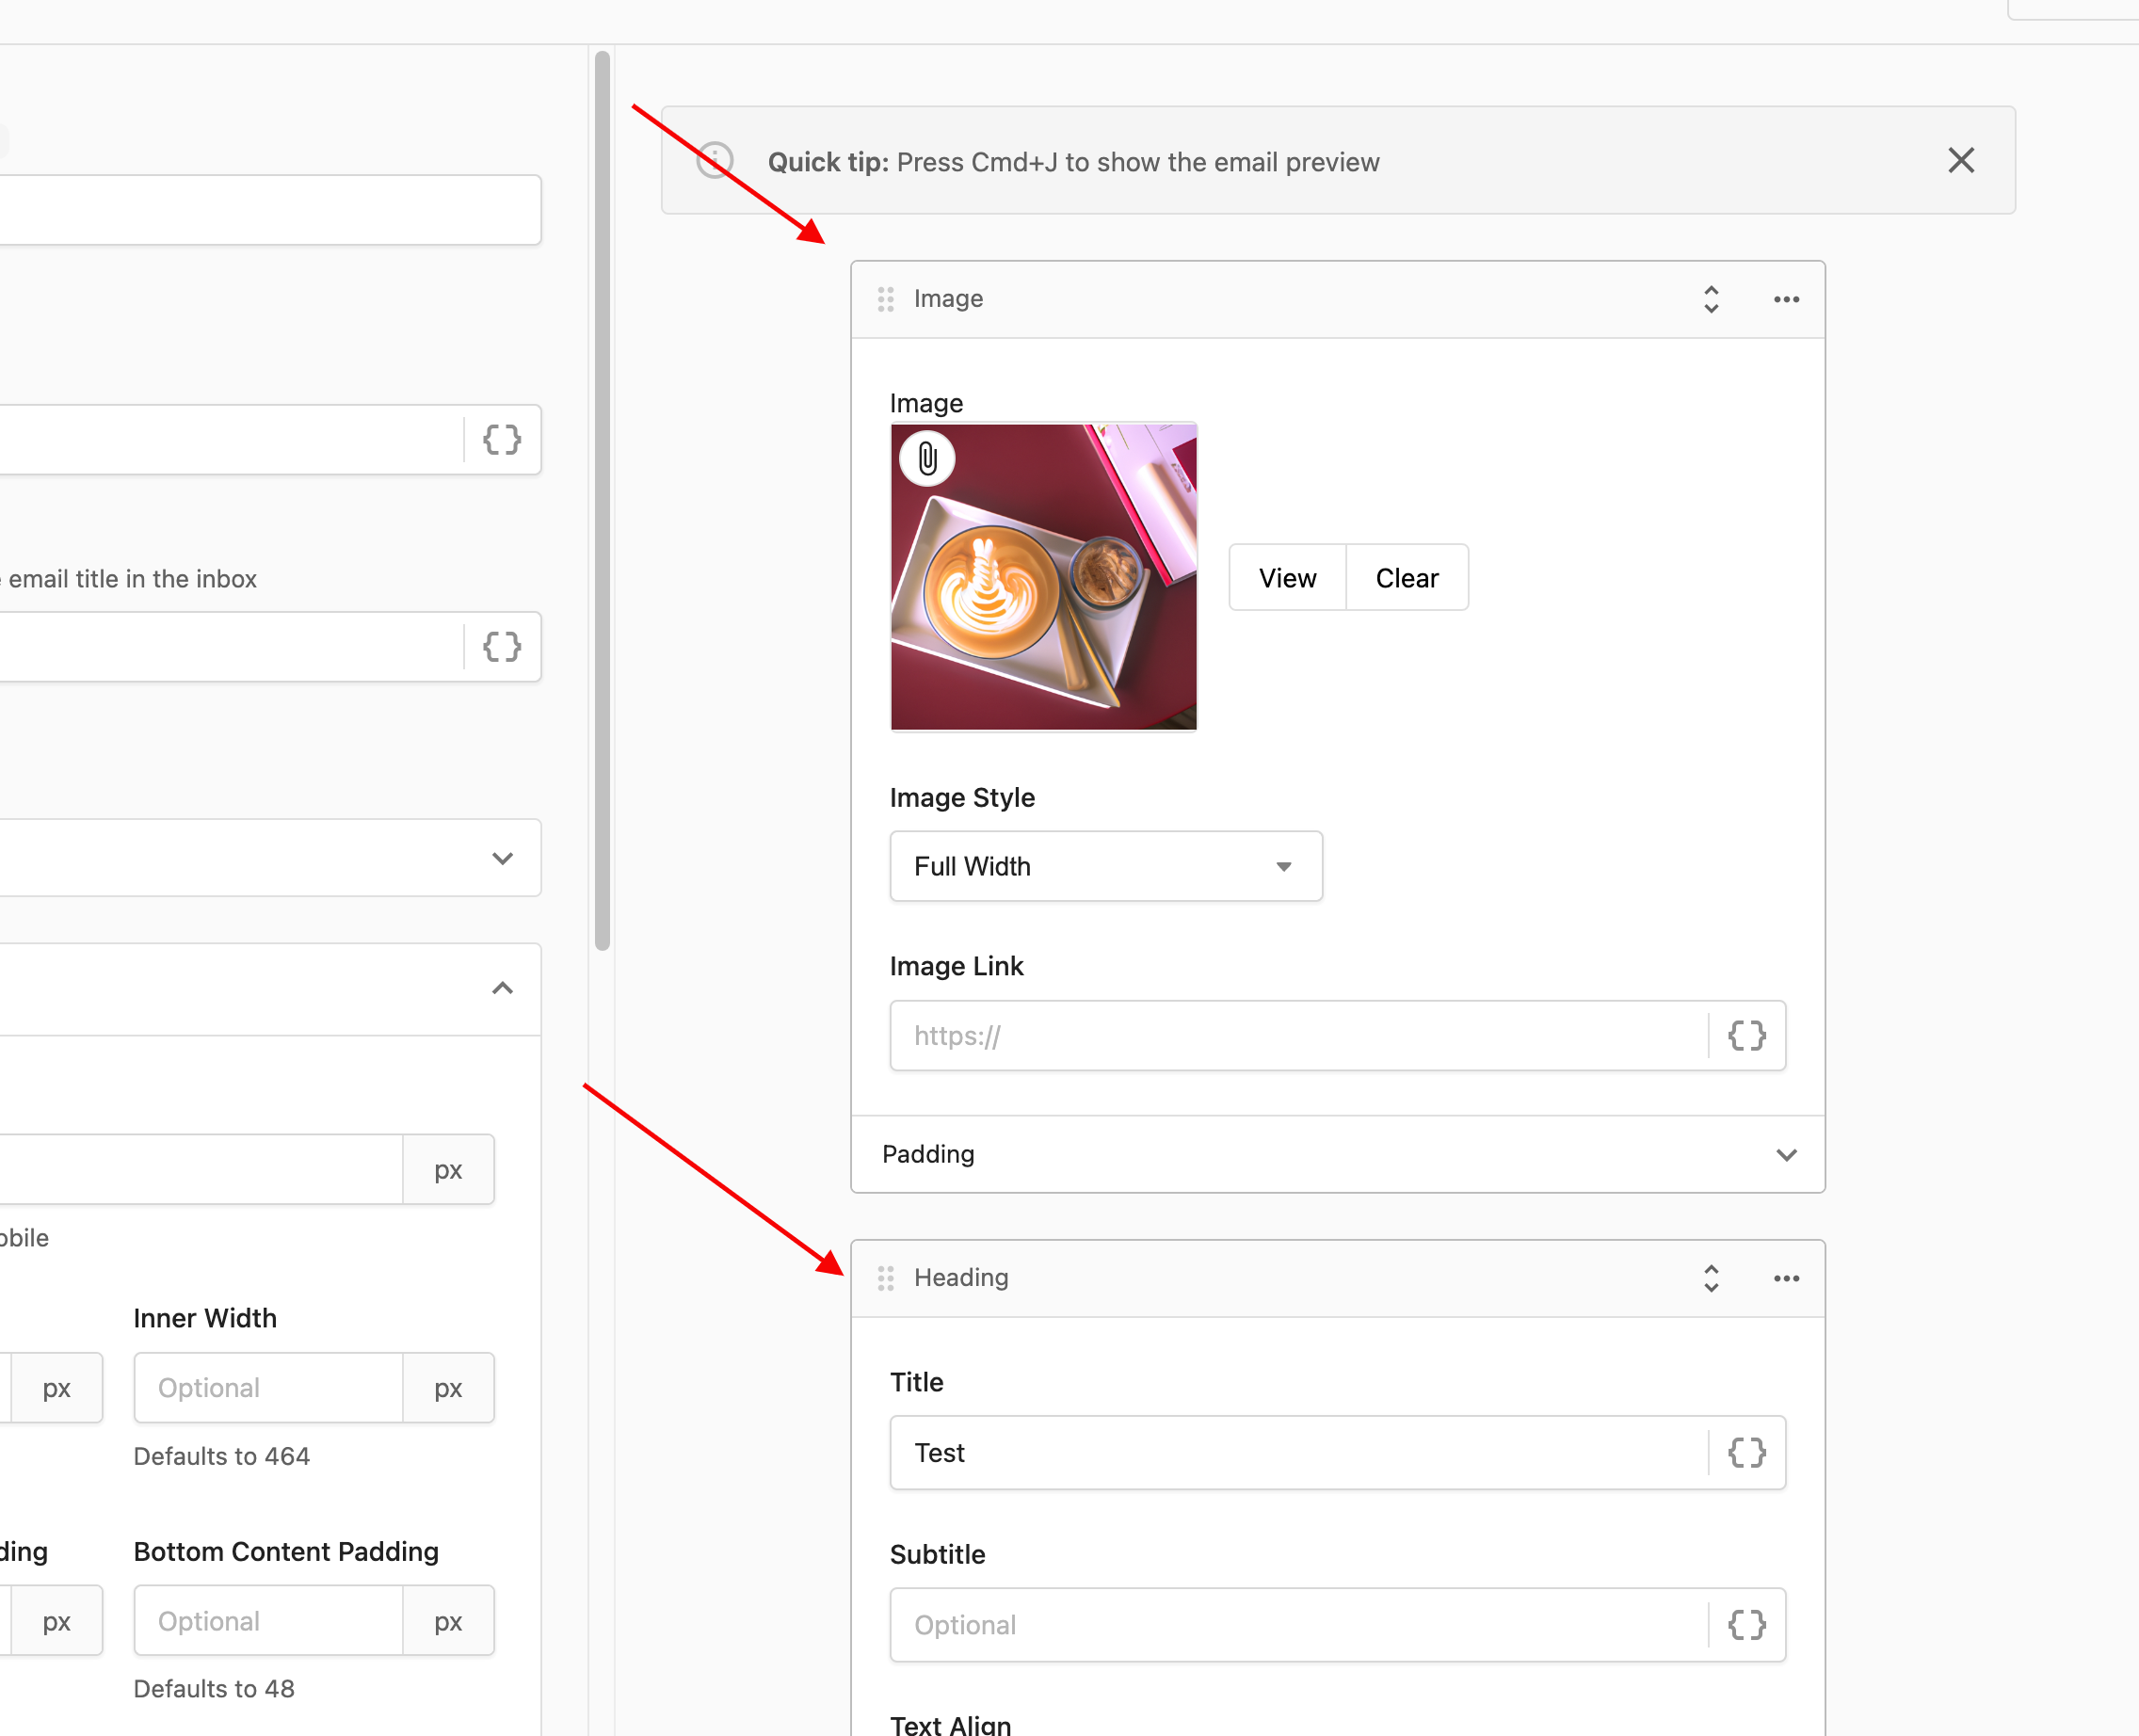
After creating content blocks, they can be dragged and dropped to re-order the content.
Click Preview in the top right-hand corner to check out your email!
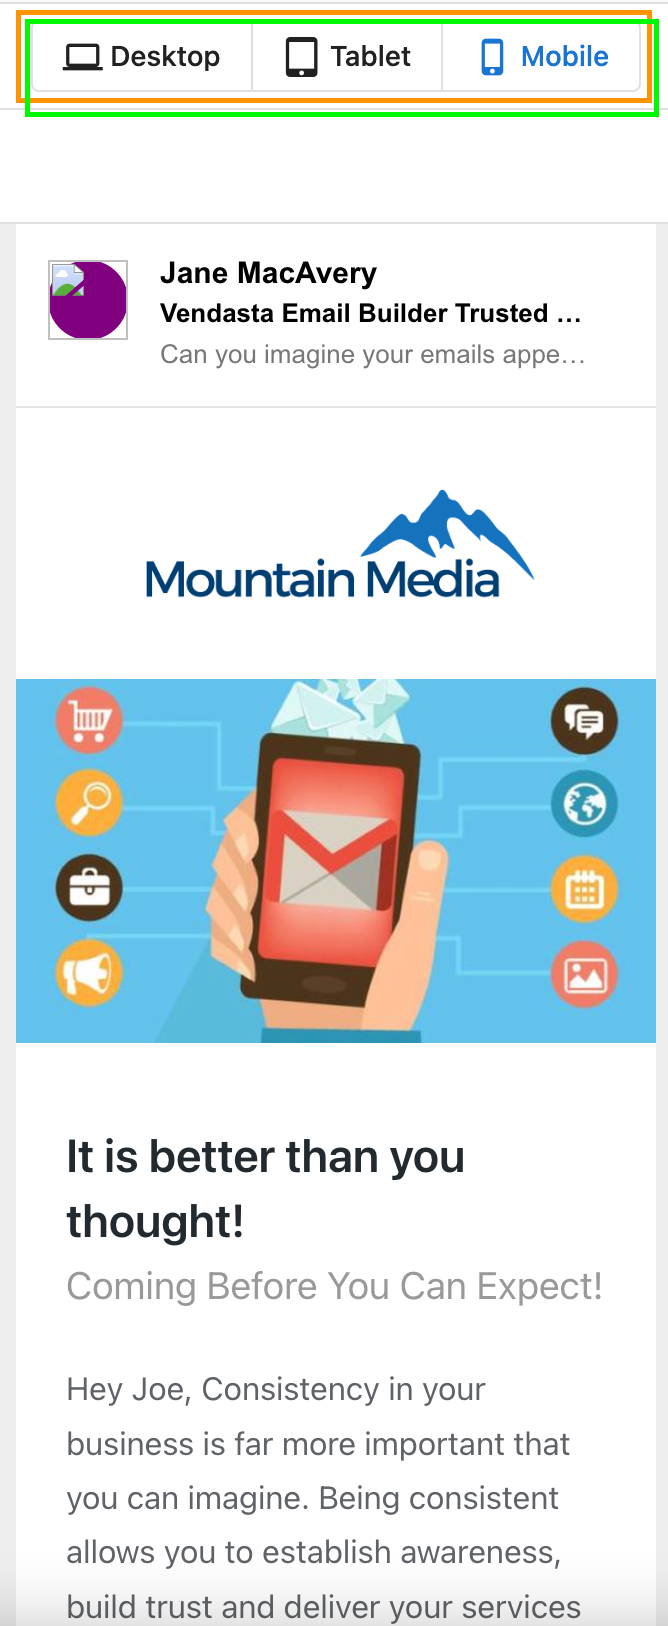
Preview on different devices
You can see how your email will appear on different devices in real-time with the click of a button. This ensures your emails look great whether opened on desktop, tablet, or mobile.
Additional email builder features
- Side-by-side content: Render images and text side by side with simple click and selection
- Color customization: Change colors for text, titles, subtitles, links, footer text, content background, and page background
- Customizable buttons: Choose colors, link to URLs, customize button text, and add dynamic components
- Tables: Add simple tables to arrange data intuitively in your emails
- Contact cards: Personalize emails with contact images and details
Email builder limitations
- An email can only be edited in the Email Builder version it was originally created in. It can't be moved to a different version.
- You can't switch an email to a different Email Builder version partway through creating it.
How do I use email templates in campaigns?
Campaigns are drip-style marketing automation that send scheduled email sequences to your contacts and companies. They're perfect for time-based marketing where you want to send a series of emails at predetermined intervals. You can use pre-built templates or create custom emails.
Using recommended campaign templates
Recommended campaigns are ready-made email templates that you can copy and customize.
To use recommended templates:
- Go to
Partner Center→Marketing→Campaigns - Go to the
Recommended Campaignstab
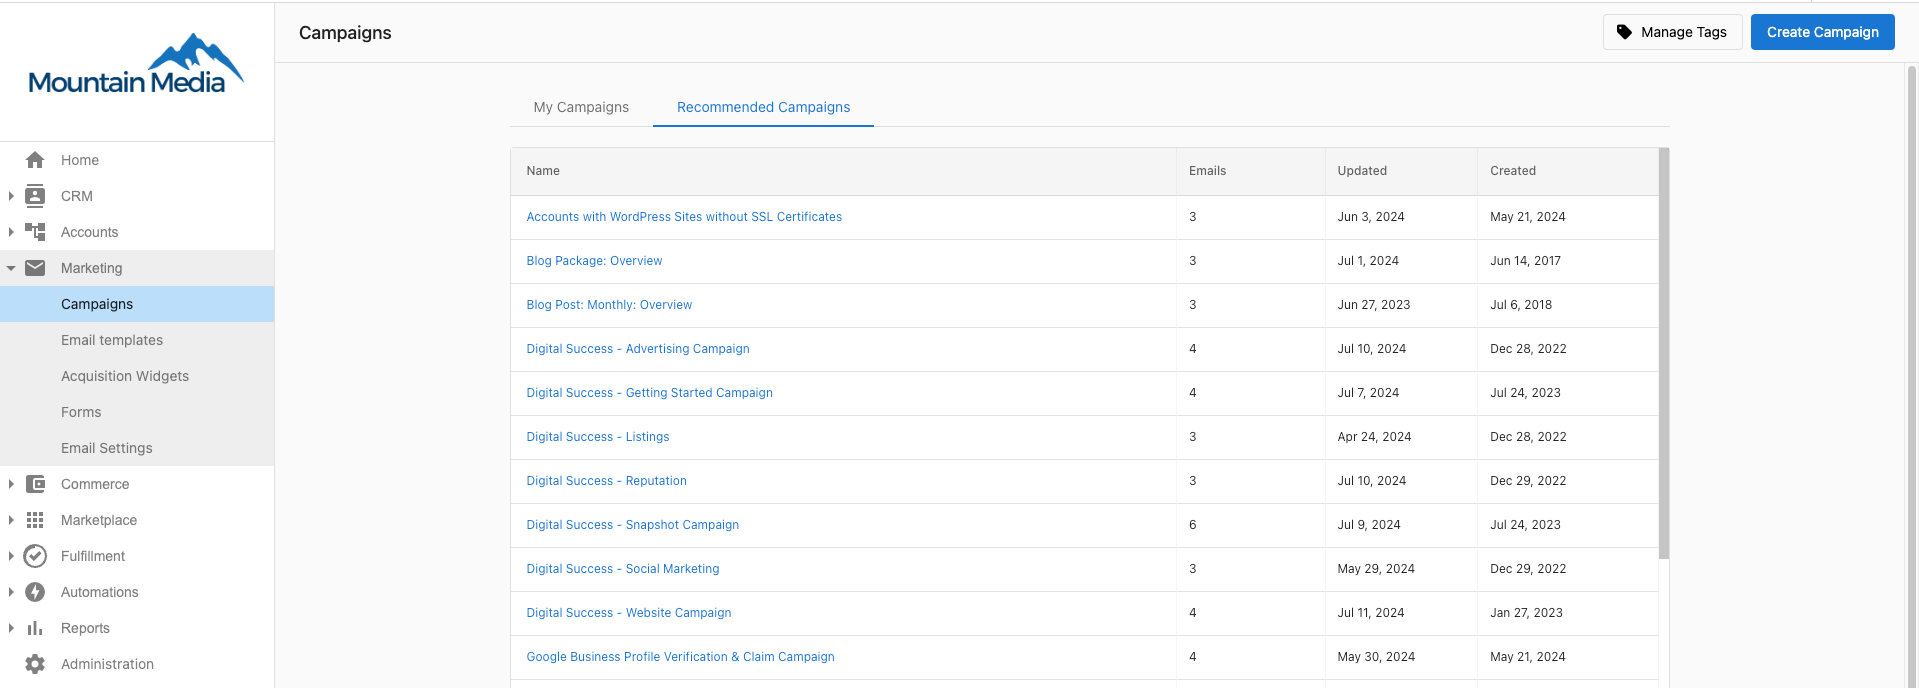
- Browse the selection of ready-made campaigns
You can preview each email template within a campaign by clicking the campaign name.
- When you find a campaign template you like:
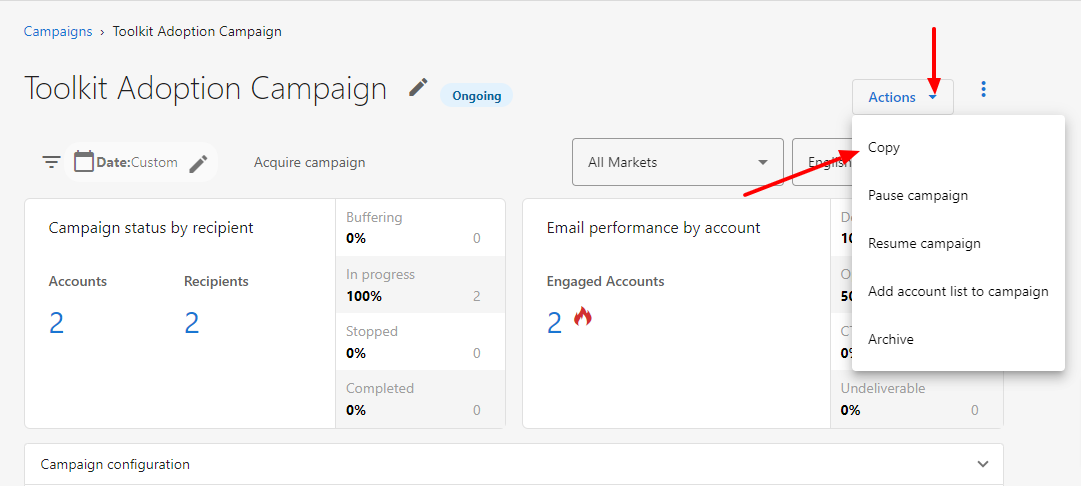
- Click on the campaign name, then click
Actions→Copy
- Click on the campaign name, then click
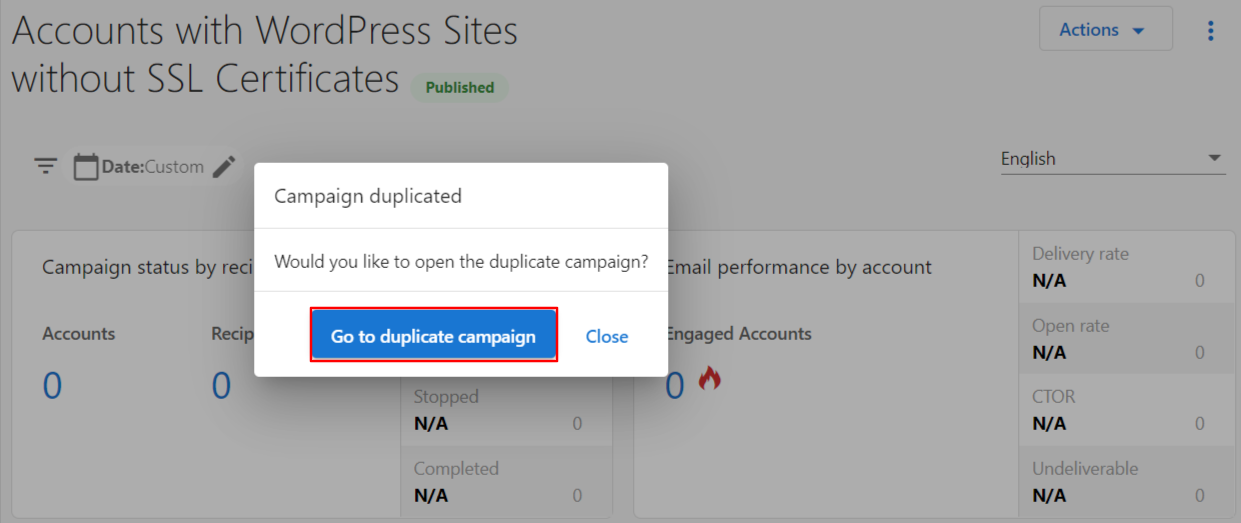
- Go to the Duplicate Campaign and customize as needed
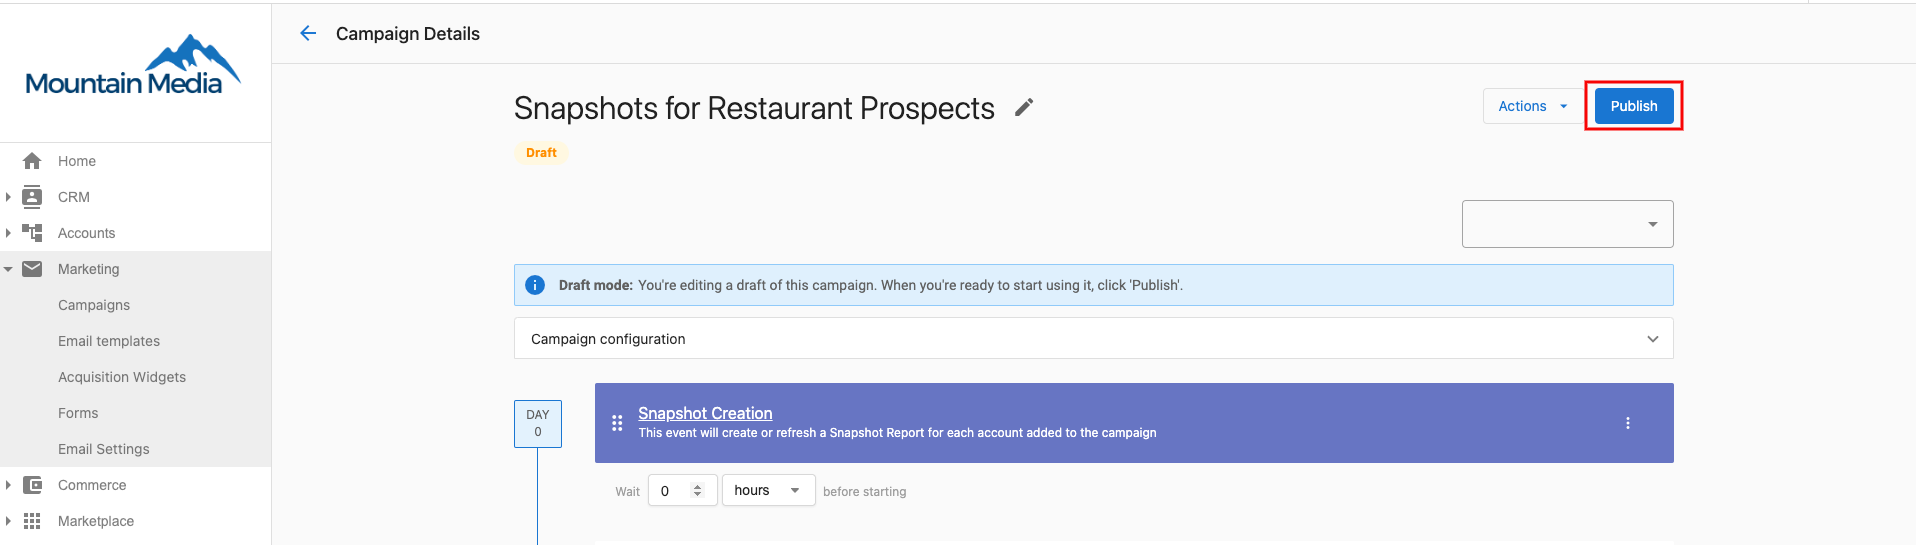
- Edit the email templates and campaign details. The campaign must be in Draft Status to allow editing
- When ready, click
Publish
Creating custom campaign emails
Build custom email campaigns with complete control over design and content.
- Go to
Partner Center→Marketing→Campaigns - Click
Create Campaignin the upper right.
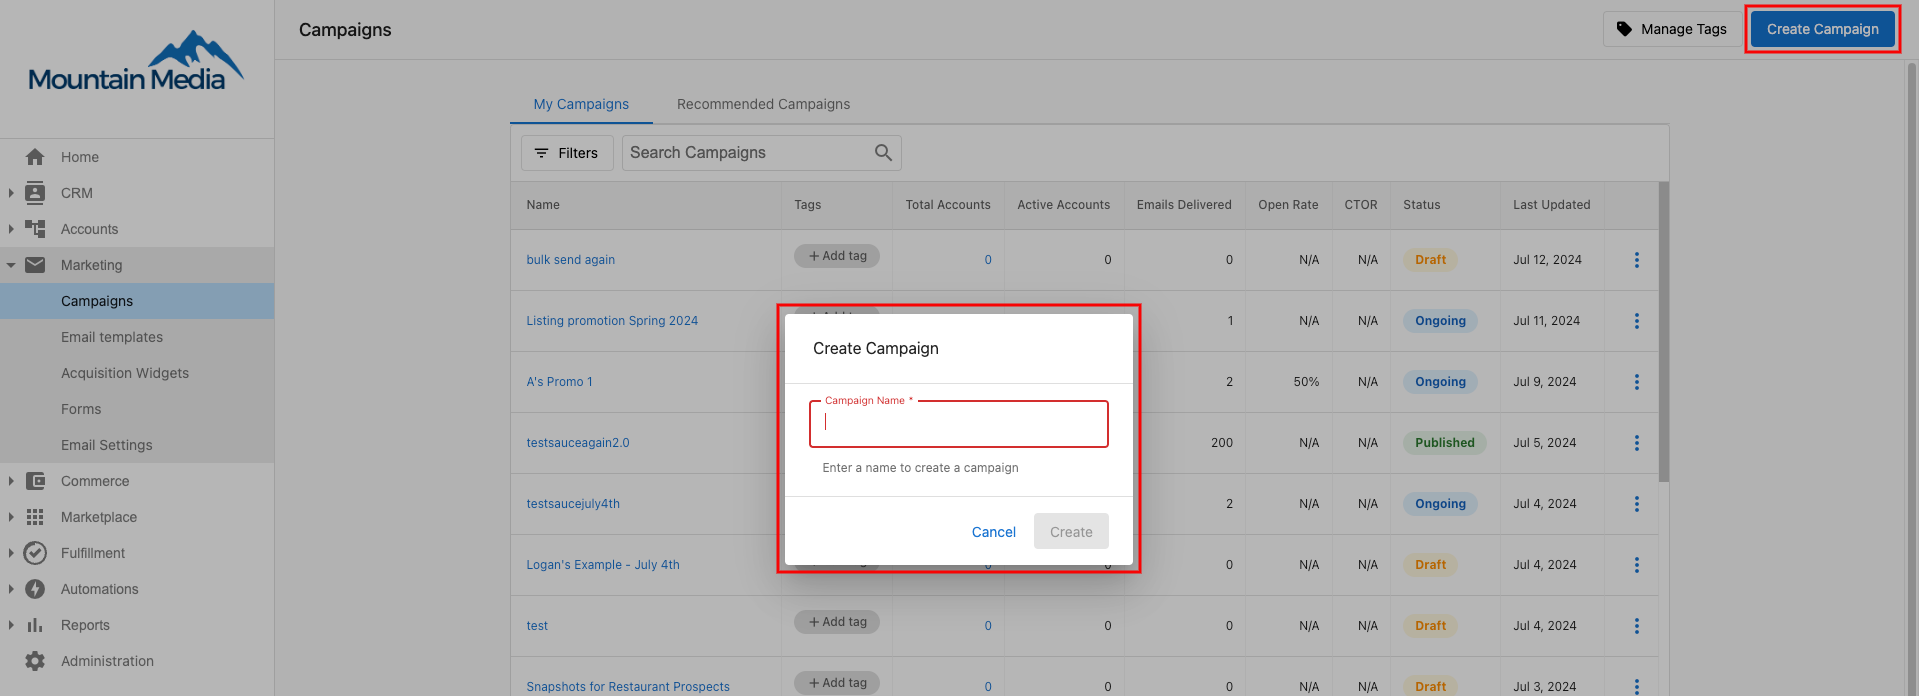
- Enter a descriptive name for the campaign that your salespeople will recognize. Click
Create. - Click
Add existing emailorCreate new email
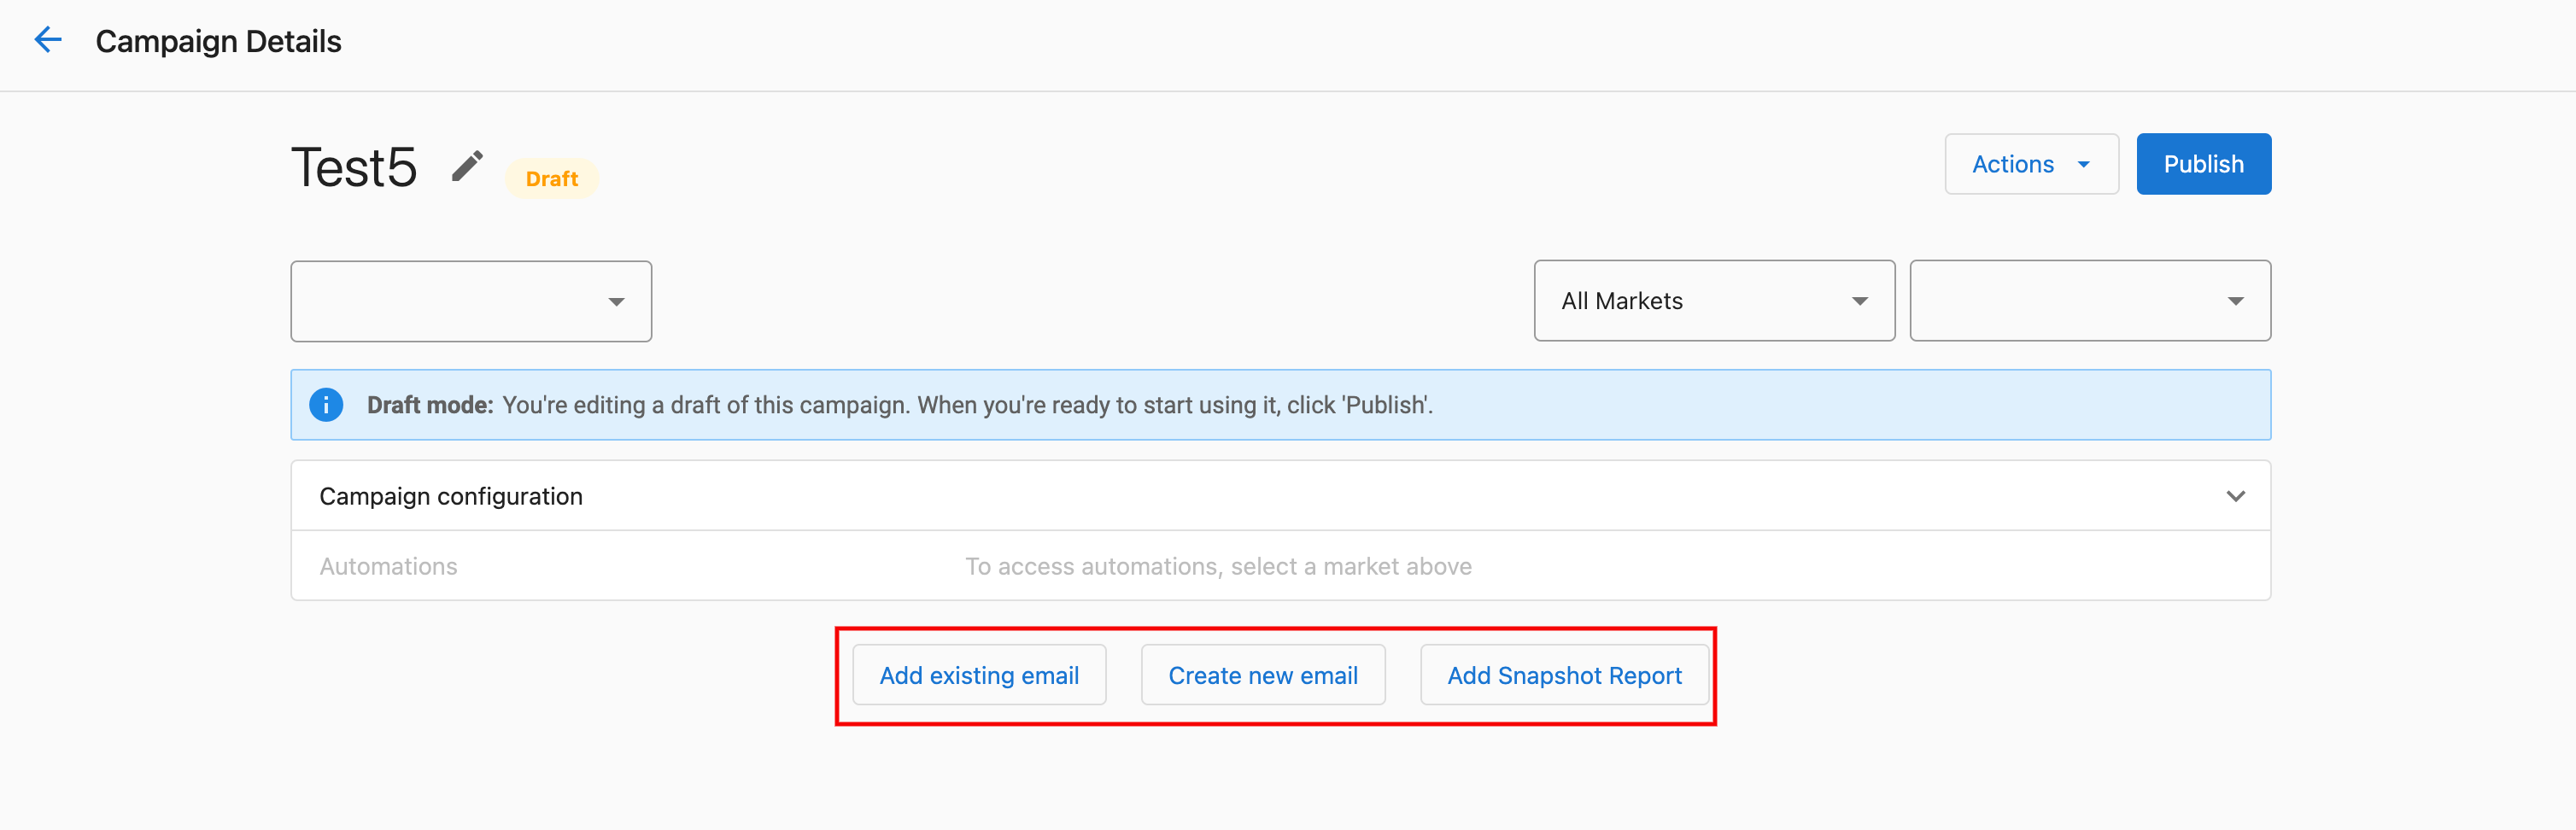
- If you select
Create new email, you will enter the Email Builder.
Campaign Setup Process:
-
Continue adding email events until you have finished creating the campaign
-
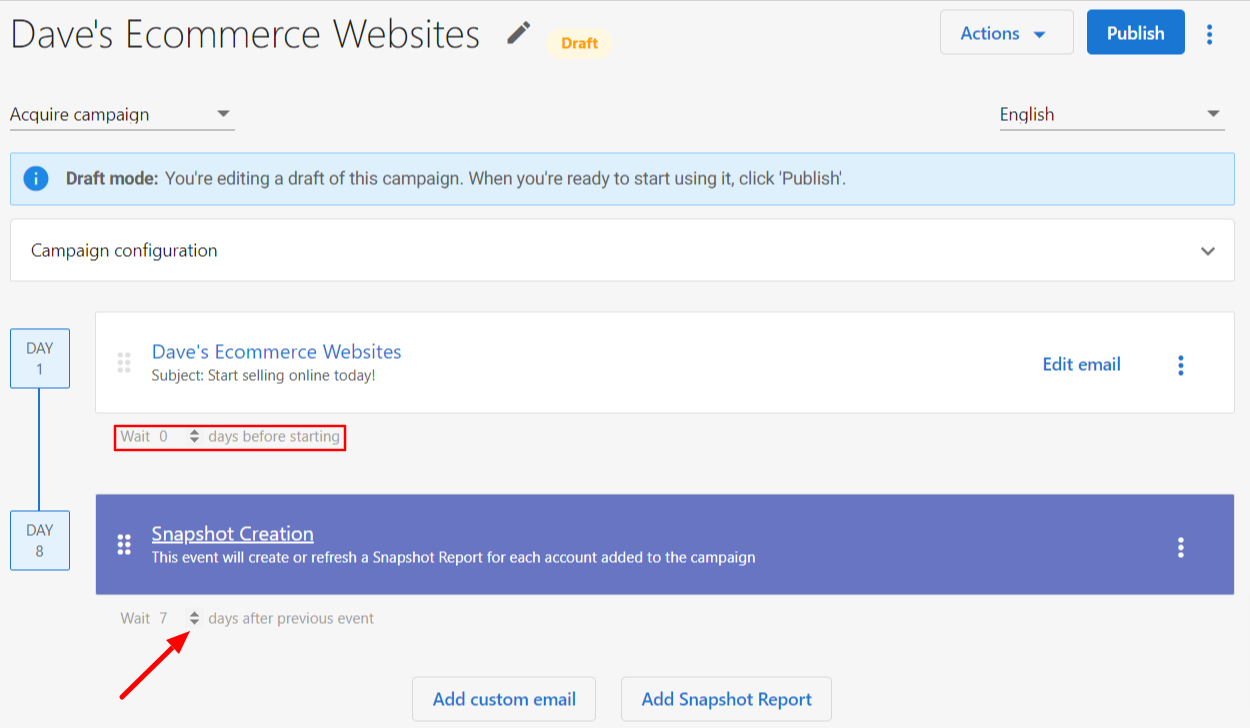
Configure campaign timing and delivery settings (fixed intervals between emails):
- Adjust the "days before starting" or "days before previous event"
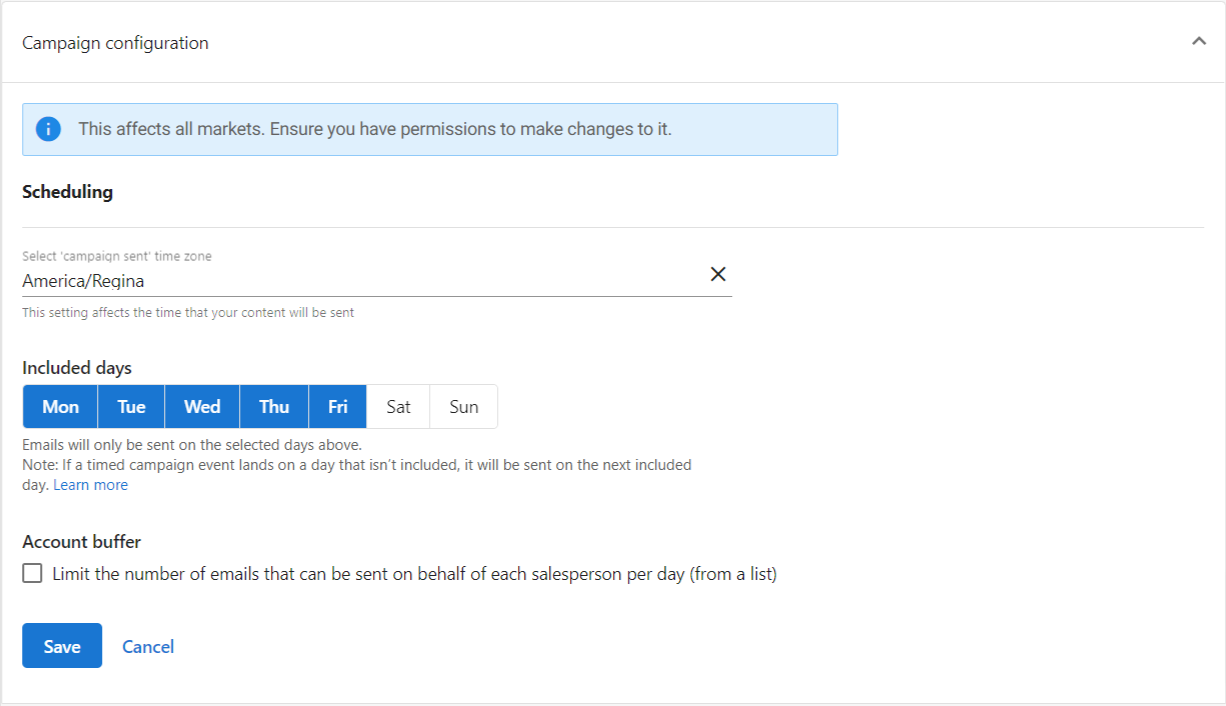
- Configure your campaign delivery settings
-
Preview and test your emails before publishing
Campaign Limitations: Campaigns provide straightforward drip sequences but lack conditional branching, trigger responses, or dynamic timing. For more sophisticated email marketing with conditional logic and smart triggers, consider using Automations instead.
How do I use email templates in automations?
Automations are intelligent marketing workflows that support both drip sequences AND conditional logic. Unlike simple campaigns, automations can respond to contact actions, form submissions, business events, and data changes in real-time. This advanced approach enables both scheduled sequences and smart, responsive communication based on contact behavior and business intelligence.
Setting up email automation
To create automated email sequences:
- Go to
Partner Center→Automations - Click
Create Automationor select an existing automation template - Choose your trigger (form submission, contact creation, opportunity stage change, etc.)
- Add email steps to your automation workflow:
Email Automation Steps:
- Send Email to Contact - Send personalized emails to individual contacts
- Send Email to Company - Send business-focused emails to all contacts at a company (up to 50 contacts)
- Start Campaign for Contact - Trigger an existing campaign sequence for the contact
- Start Campaign for Company - Trigger an existing campaign sequence for the company
- Campaign Step - Use existing campaigns as building blocks within automation workflows
Email template creation in automations
When adding email steps to automations:
- Select Email Step: Choose "Send Email to Contact", "Send Email to Company", or use the "Campaign" step
- Create Email Template: Click
Create new emailto access the Email Builder, or select existing campaigns - Design Your Email: Use the same Email Builder interface with full personalization capabilities
- Add Dynamic Content: Include contact, company, and business data relevant to the trigger
- Set Conditions: Add logic to determine when emails should send
Using Campaign Steps in Automations: The "Campaign" step allows you to incorporate existing drip campaigns as building blocks within your automation workflows. This lets you combine the simplicity of pre-built campaigns with the advanced conditional logic of automations.
Automation email benefits
Drip Sequence Capabilities (Like Campaigns, But Smarter):
- Create time-based email sequences with conditional branching
- Add waiting periods, decision points, and dynamic timing
- Support complex drip logic that campaigns cannot handle
Advanced Conditional Logic:
- Branch workflows based on contact responses or actions
- Create different email paths based on contact/company data
- Stop, pause, or redirect sequences based on real-time conditions
Trigger-Based Delivery:
- Respond immediately to contact actions (form submissions, login activity, email clicks)
- Send relevant content based on business events (product activation, opportunity changes)
- Nurture leads automatically based on engagement and behavior patterns
Advanced Personalization:
- Use trigger data in email content (form responses, opportunity details, product activation status)
- Reference specific business events that triggered the email
- Include real-time data like snapshot reports or product usage metrics
- Dynamic content that updates based on current contact/company state
Choose the Right Method:
Use Campaigns (Drip Marketing) When:
- You need simple, time-based email sequences
- You're doing straightforward marketing campaigns with predetermined timing
- You want to quickly set up basic drip sequences without complex logic
- Your email flow doesn't require conditional branching or trigger responses
Use Automations (Advanced Smart Marketing) When:
- You need conditional logic and branching in your email sequences
- You want trigger-based responses to contact actions or business events
- You need both drip sequences AND responsive communications
- You want advanced personalization based on real-time contact/company data
- You're implementing sophisticated lead nurturing with multiple pathways
- You need emails that adapt and respond to contact behavior dynamically
Recommendation: Consider using automations for most email marketing needs, as they support everything campaigns can do plus advanced conditional capabilities.
How do I configure campaign settings?
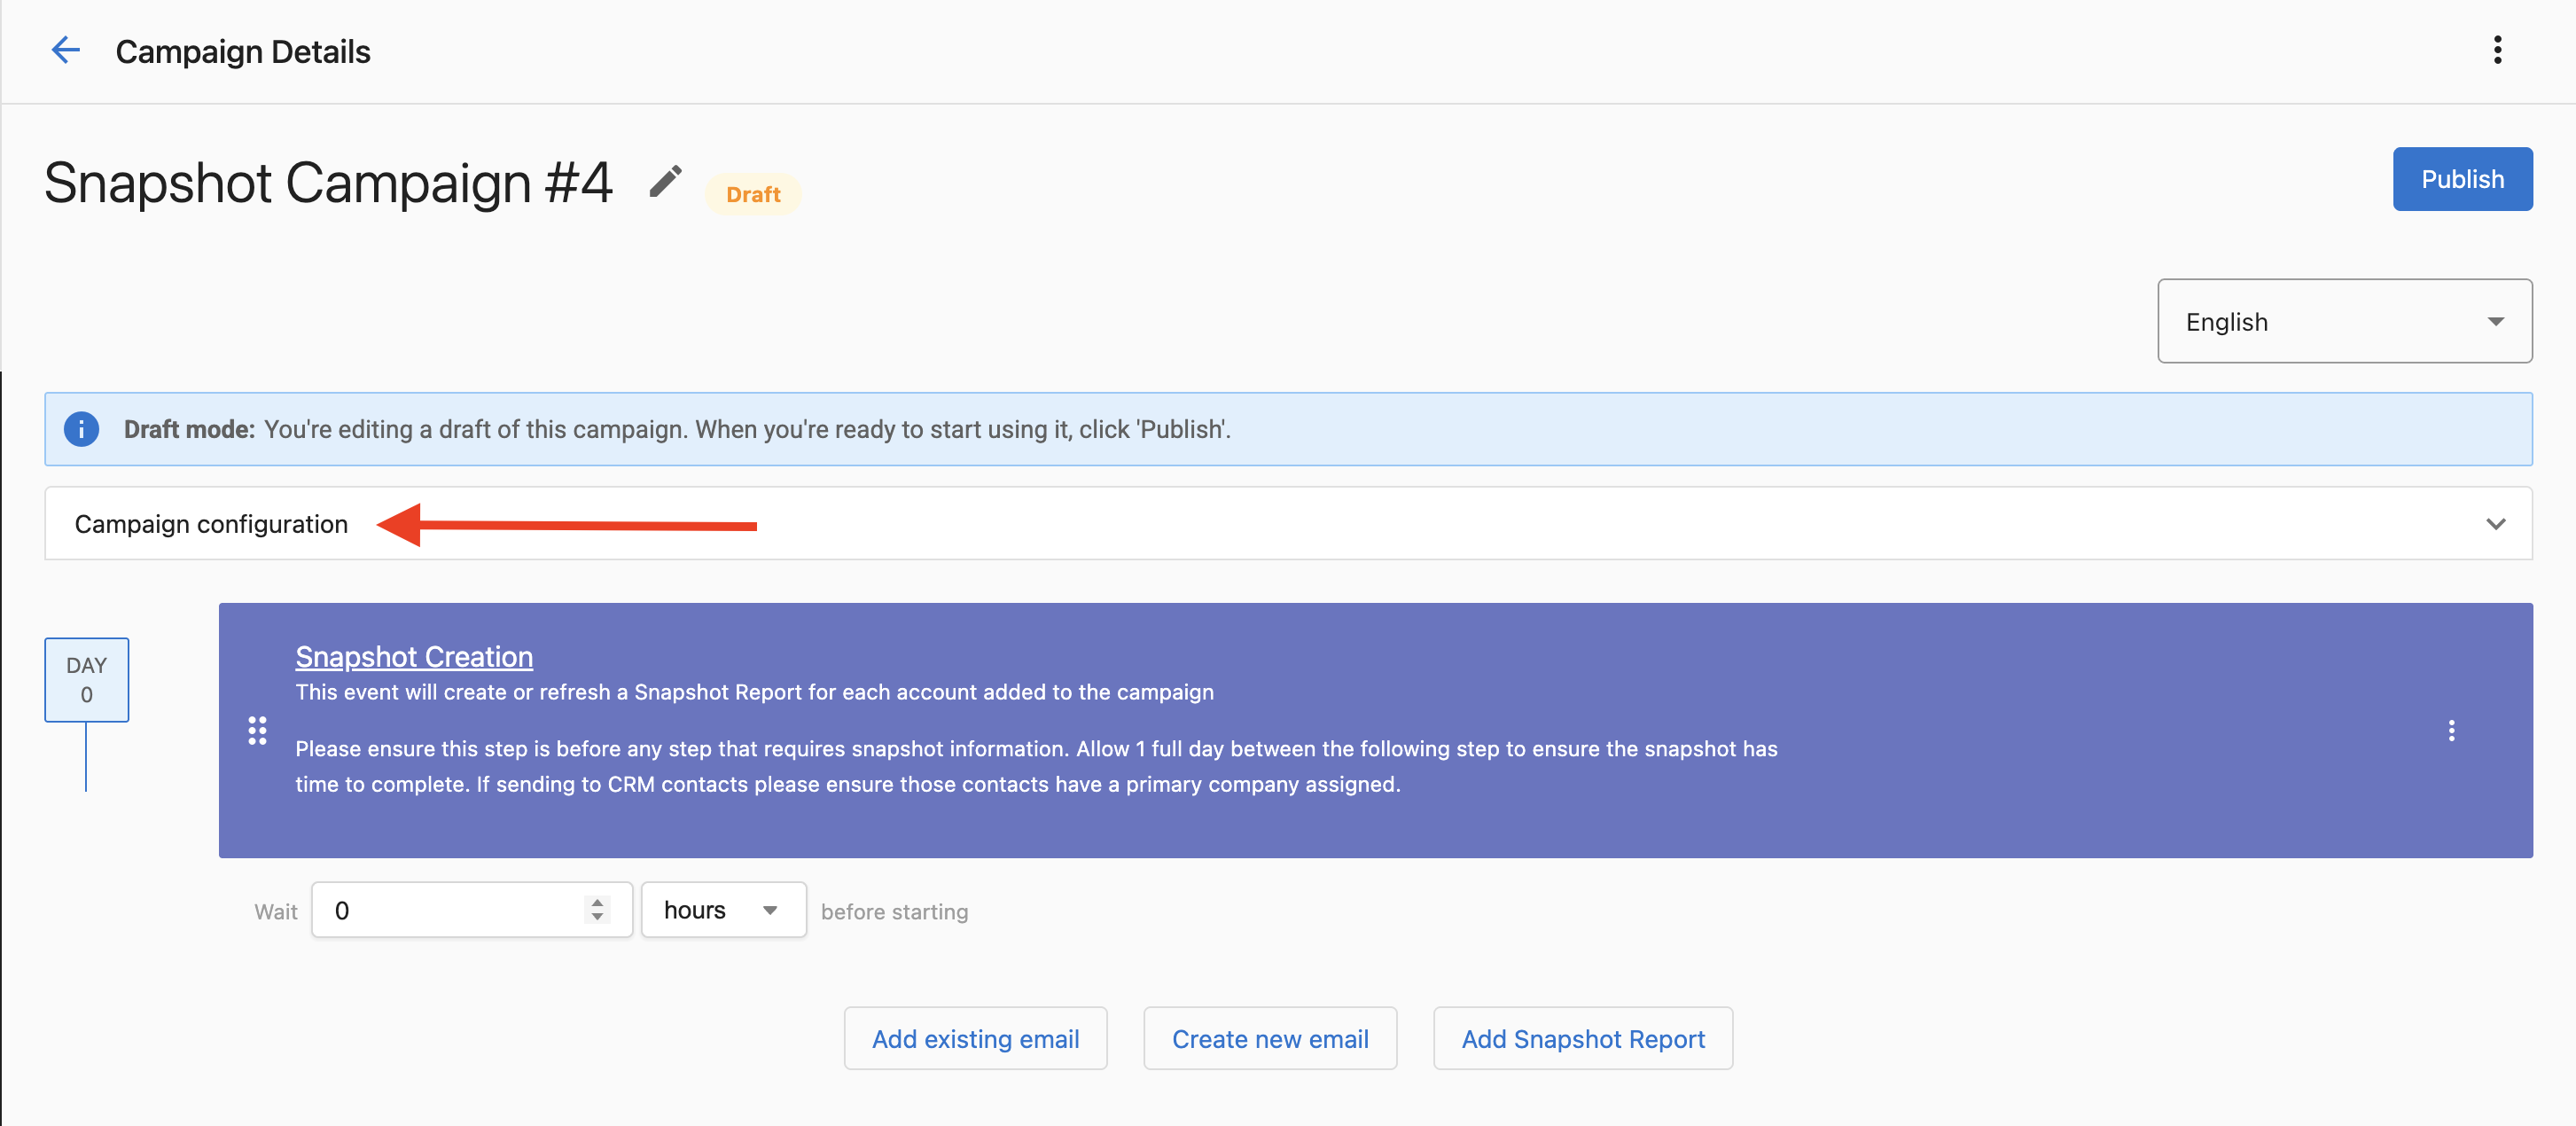
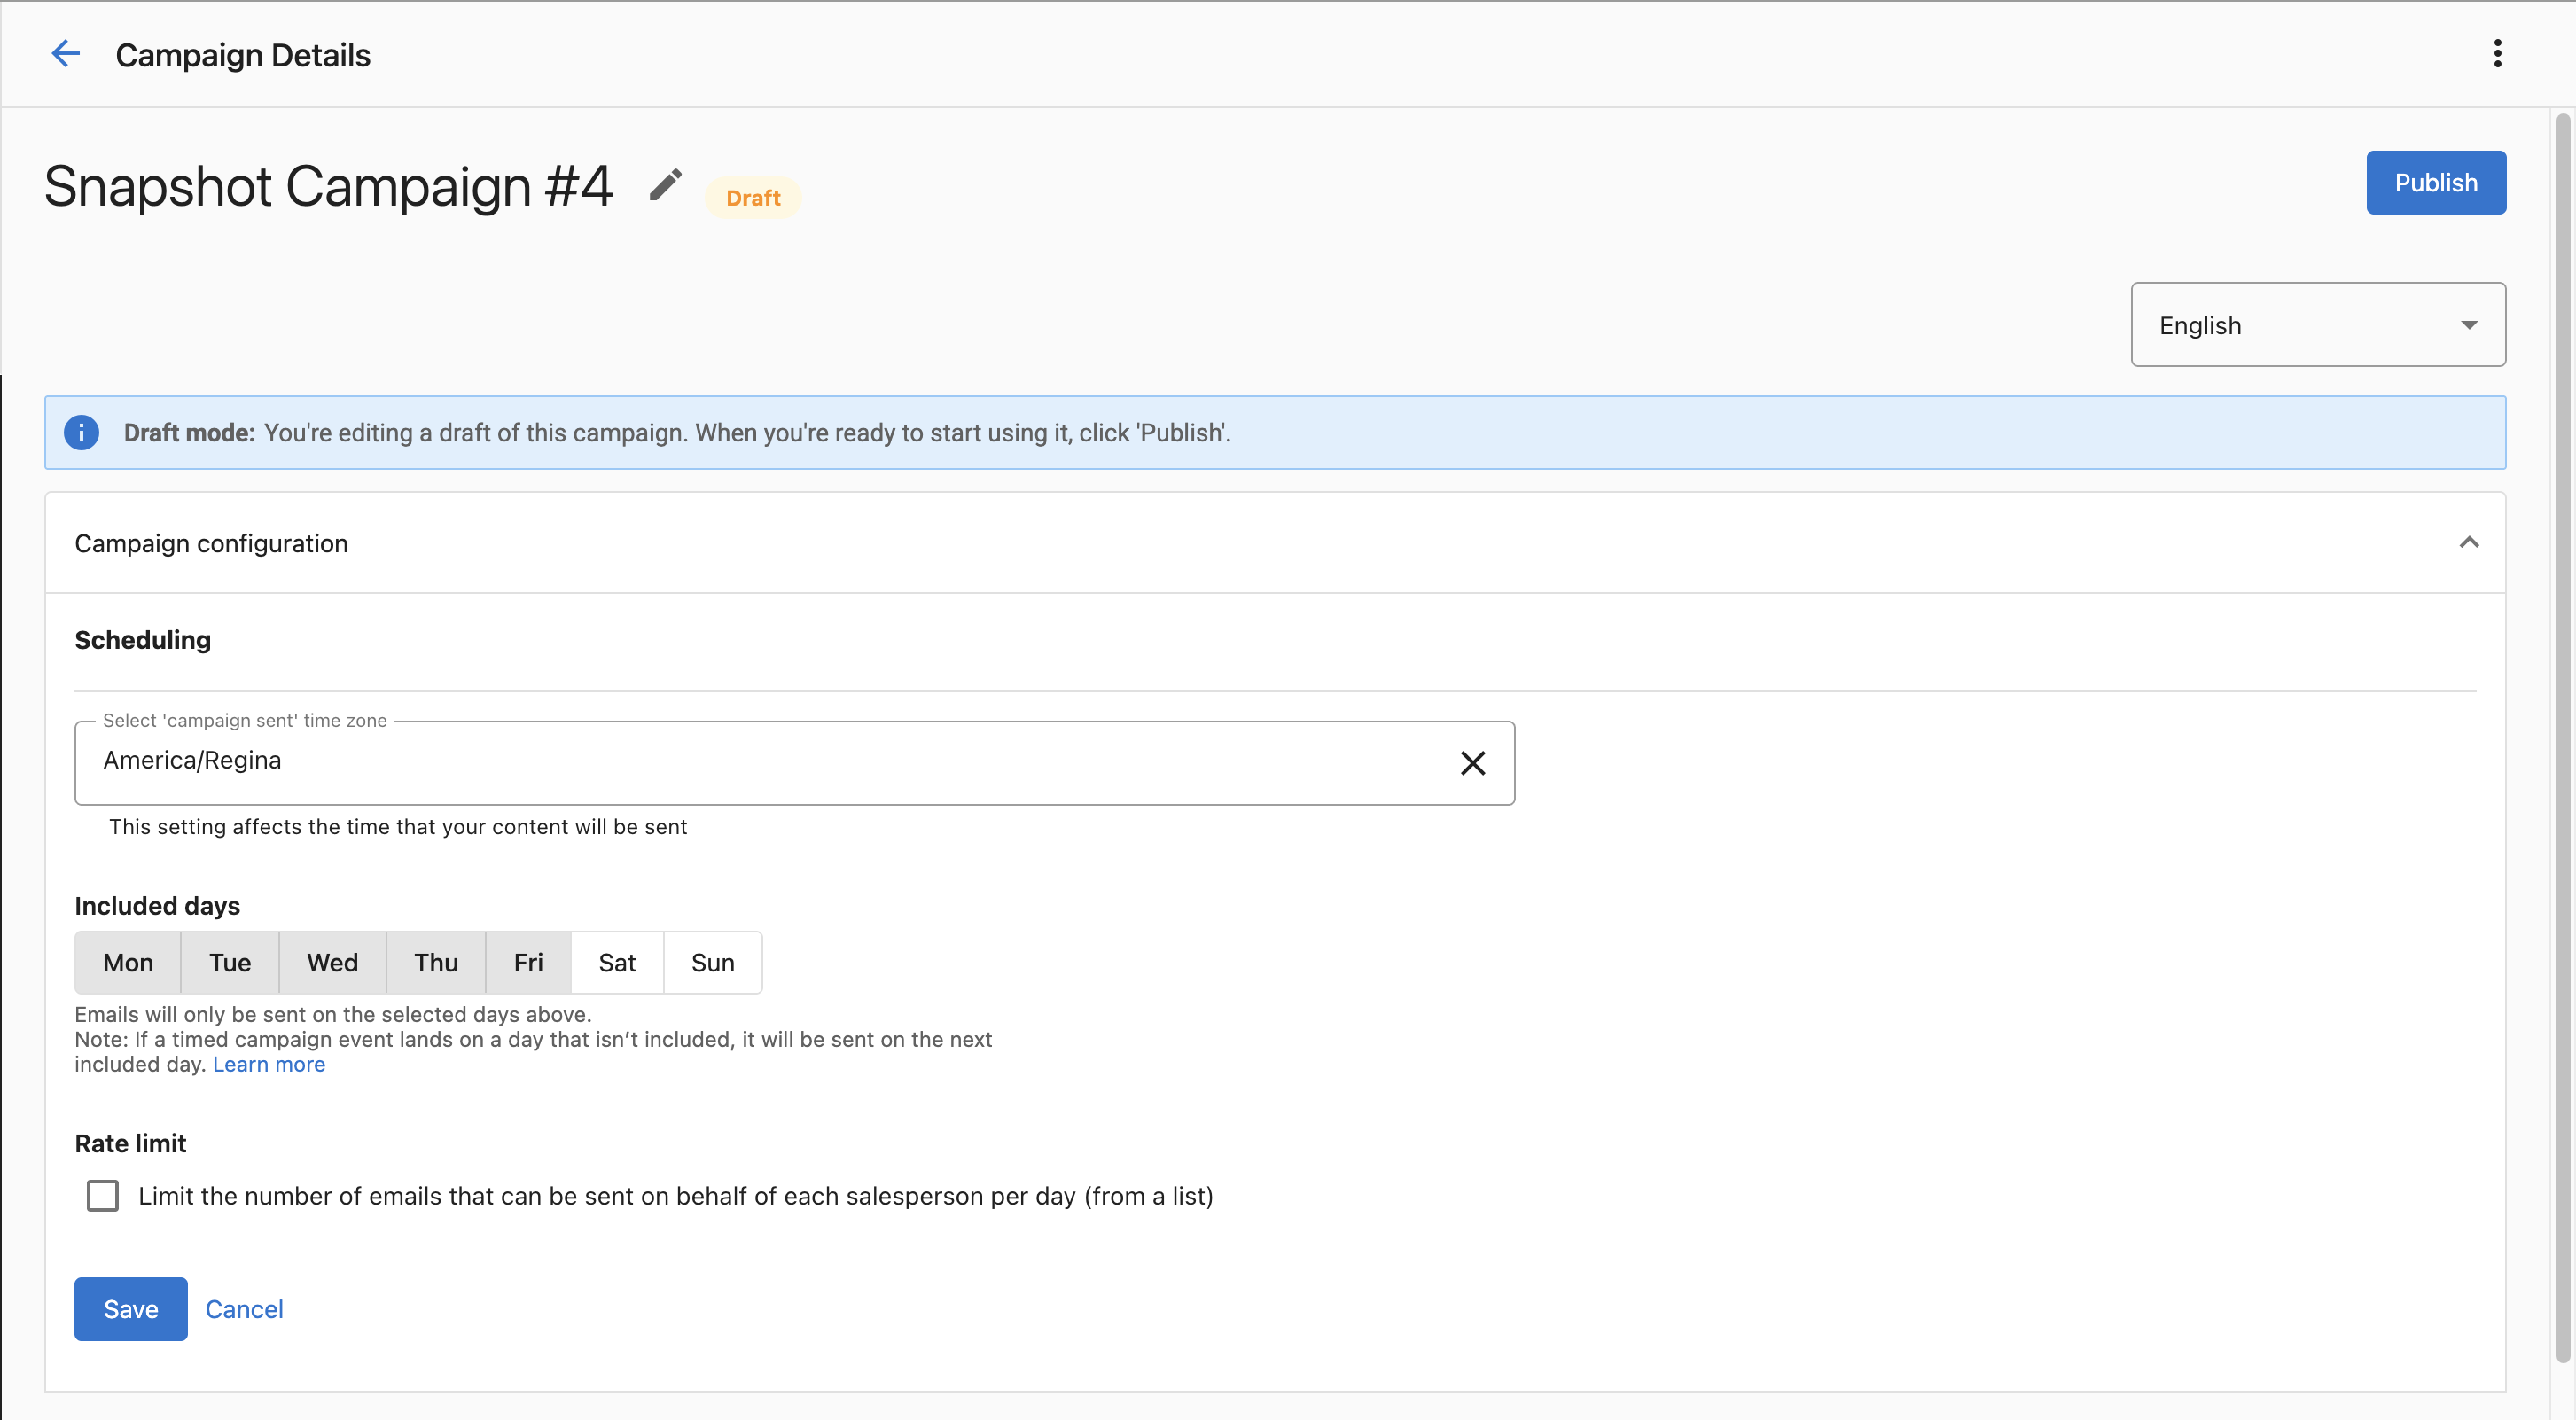
In the Campaign configuration section of a campaign, you can configure the following settings:
Time zone settings
By default, campaigns are sent in your local time zone. To change this setting:
- Select a time zone from the dropdown
- Click
Save
Included days
By default, emails are only sent Monday-Friday. However, the delays that are set between campaign events count all the days of the week. If an email is scheduled to send on a day that's not included, the email will be sent on the next included day.
For example, a campaign includes two emails: the first email occurs on Day 1, and the second email occurs on Day 4. The included days are Monday-Friday.
- If the first email is sent on a Monday, the second email will be sent on Thursday.
- If the first email is sent on Wednesday, the second email will be sent on Monday.
- If the first email is sent on Friday, the second email will be sent on Monday.
To change this setting:
- Select the days that emails should be sent on
- Click
Save
Rate limiting
This option limits the number of emails that can be sent on behalf of each salesperson per day. The limit only applies when adding a list to a campaign (not adding individual accounts). Only the first email step of a campaign is affected. The remaining emails in a campaign are sent with the delays set in the campaign. Pausing and resuming a campaign will bypass the limit.
For example, if a company has 4 salespeople, and the limit is set to 2 recipients per day, then 8 recipients will be added to the campaign per day. Each recipient will receive subsequent emails in the campaign with the delays that are set in the campaign.
By default, the limit is disabled. To turn on the limit:
- Toggle
Rate limitON - Enter the maximum number of recipients that should be added to the campaign per salesperson per day (from a list)
- Click
Save
Campaign sender settings
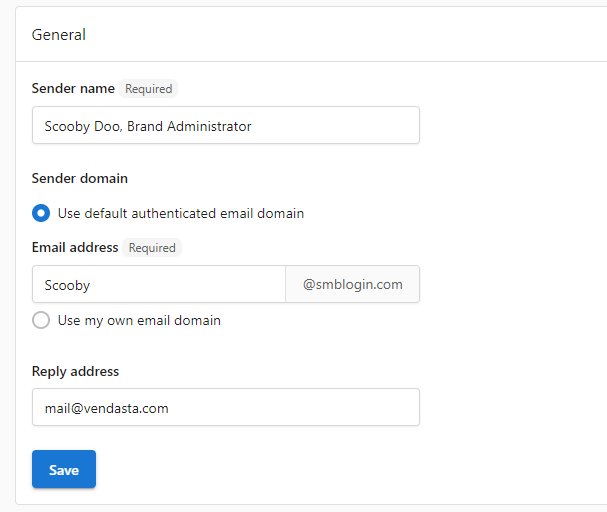
You can change the sender name in Sender name on the Sender and reply settings card, and the sender email address in Email address on the Advanced email settings card. Both are at Partner Center → Marketing → Email settings, and each card has its own Save button.
Scheduling campaigns walkthrough video
How do I test marketing emails before sending?
Whether you're using campaigns or automations, thorough testing ensures your emails perform effectively across different email clients and devices.
Email testing process
Email clients like Gmail, Apple Mail, and Outlook display emails differently. Always test your emails before sending to ensure optimal presentation and functionality.
Testing Methods:
For Campaign Emails:
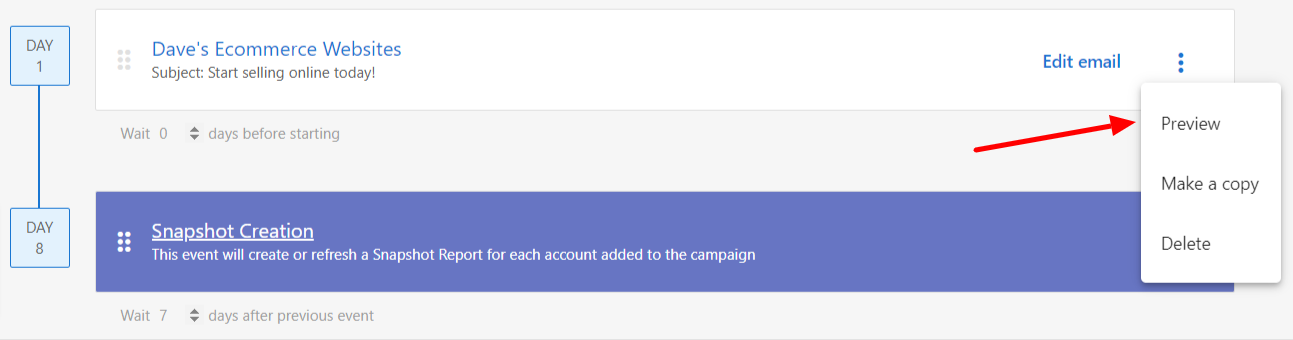
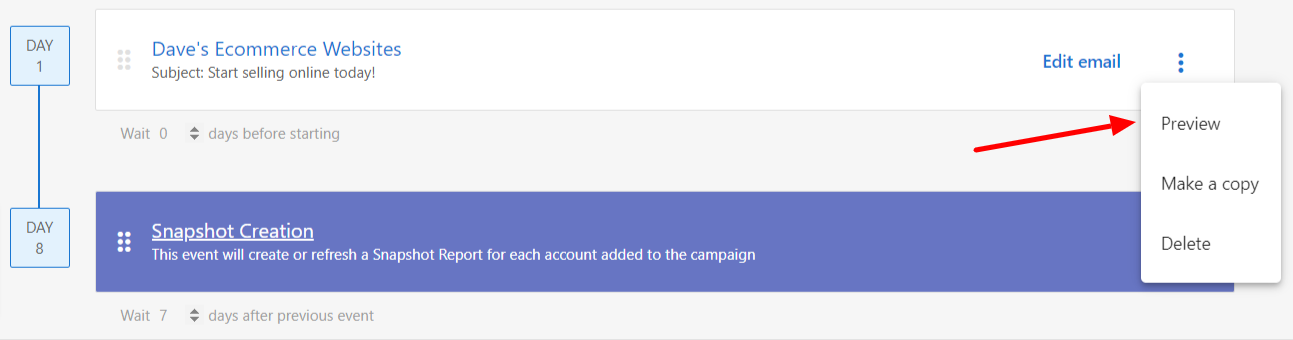
- Click
Previewunder any email in your campaign
- Click
Send Yourself a Test Email
- Enter the test email address, then click
Send Test - Test each email in your sequence
Advanced preview: testing as specific accounts
You can preview email campaigns as a specific account to ensure proper functionality and see exactly how dynamic content will appear for different businesses.
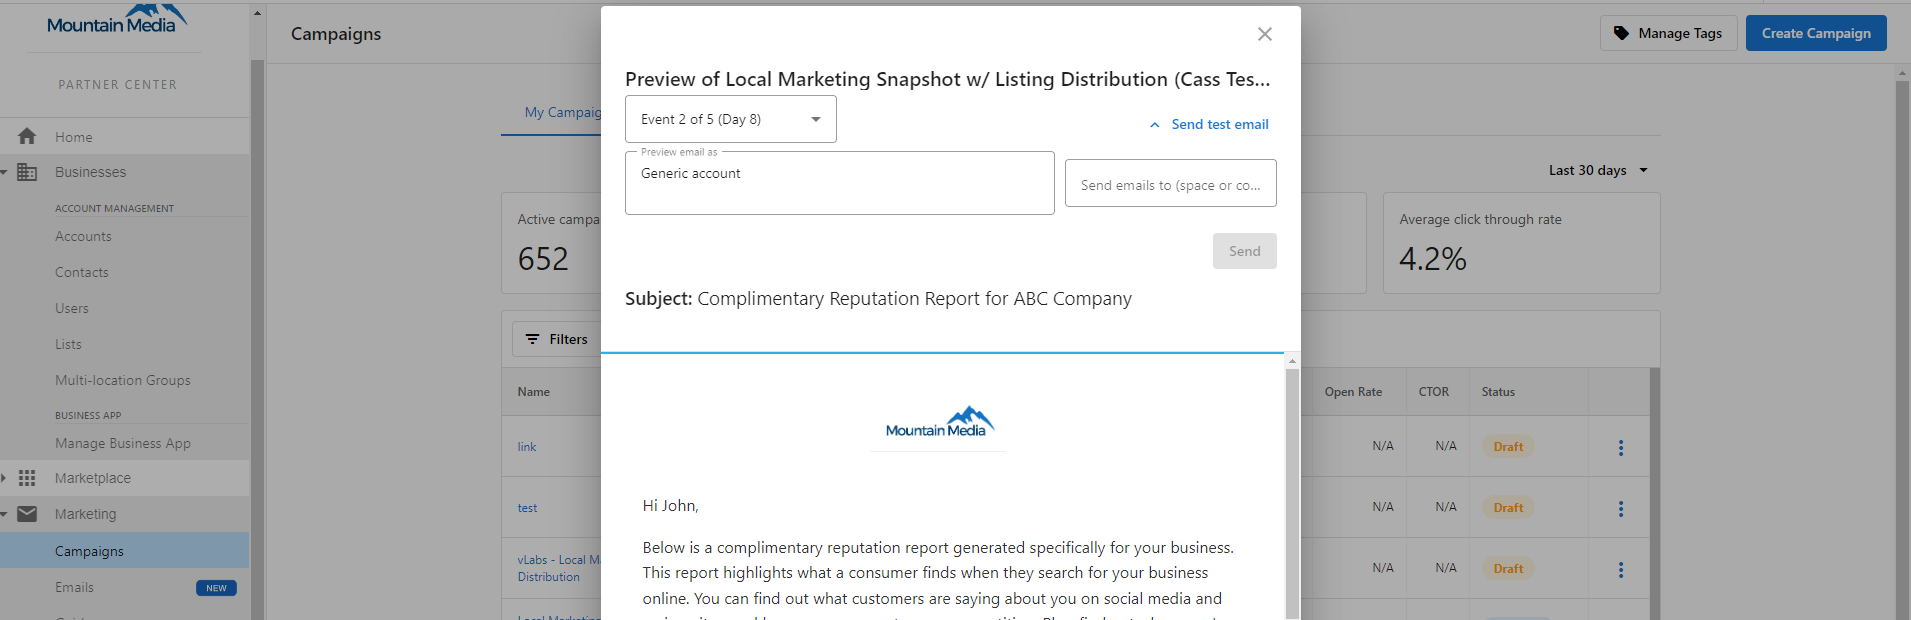
To preview campaigns as a specific account:
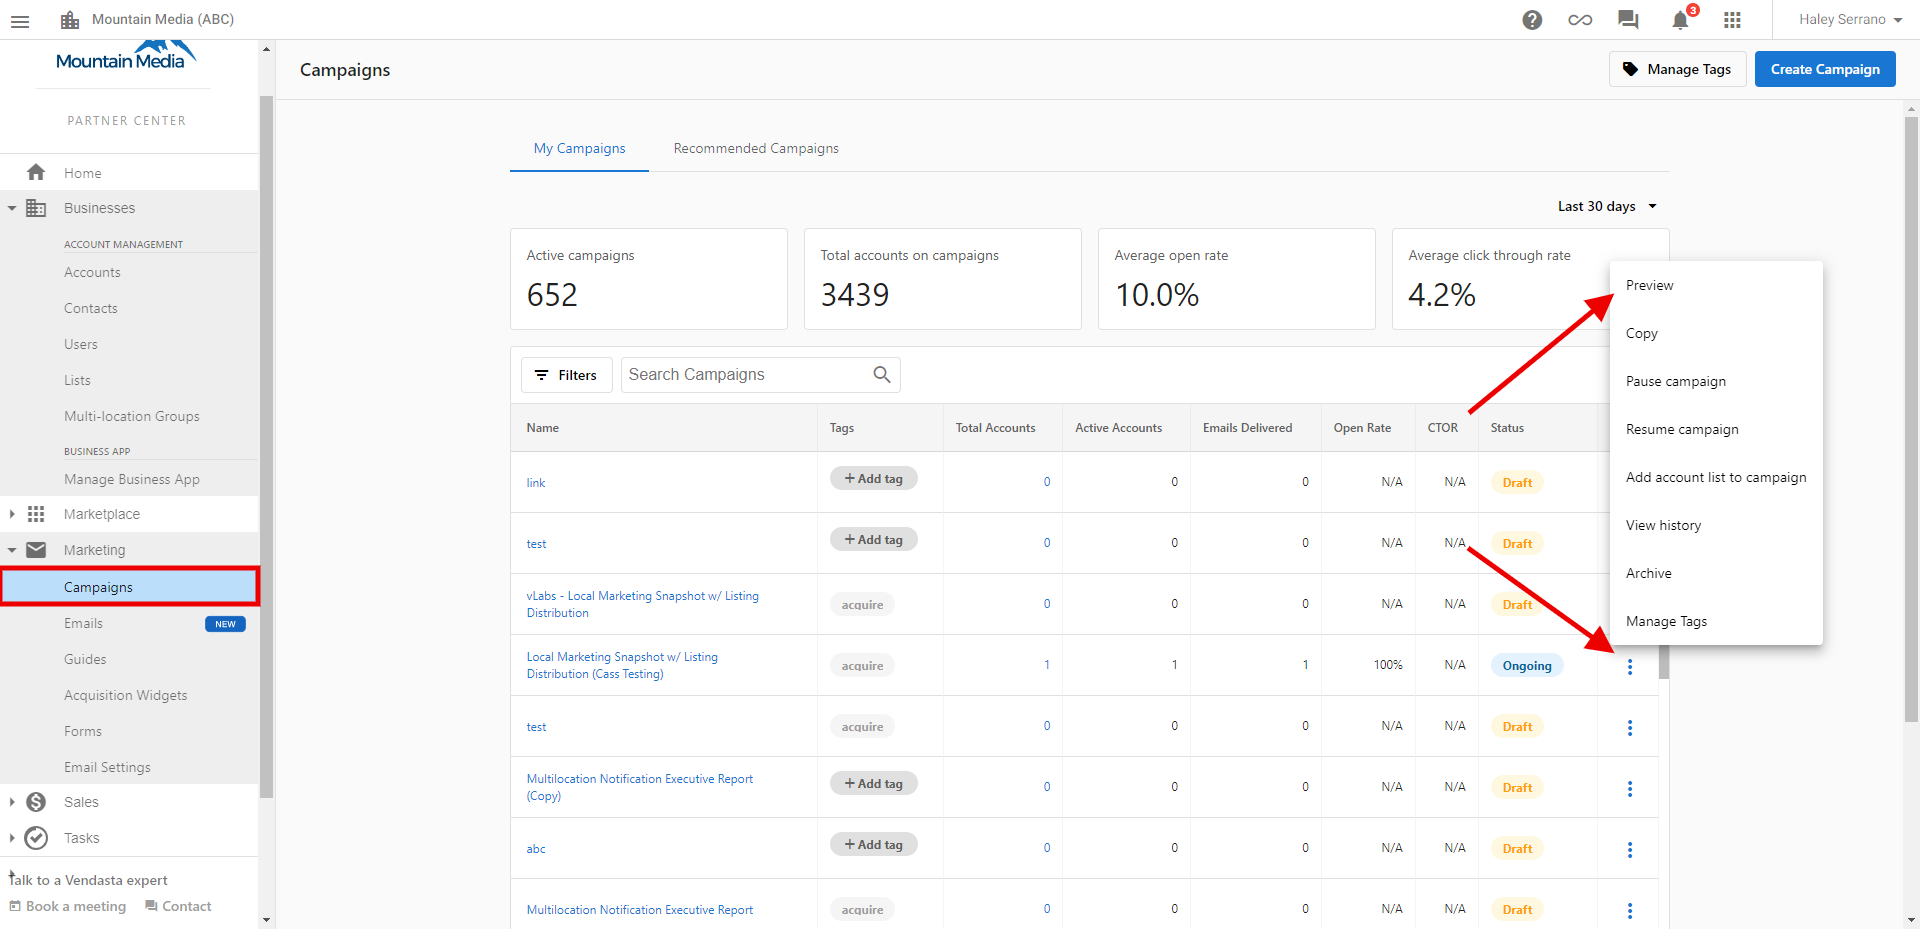
- From the campaign details page, click the
3-dotsnext to the email you want to preview - Select
Preview - Click
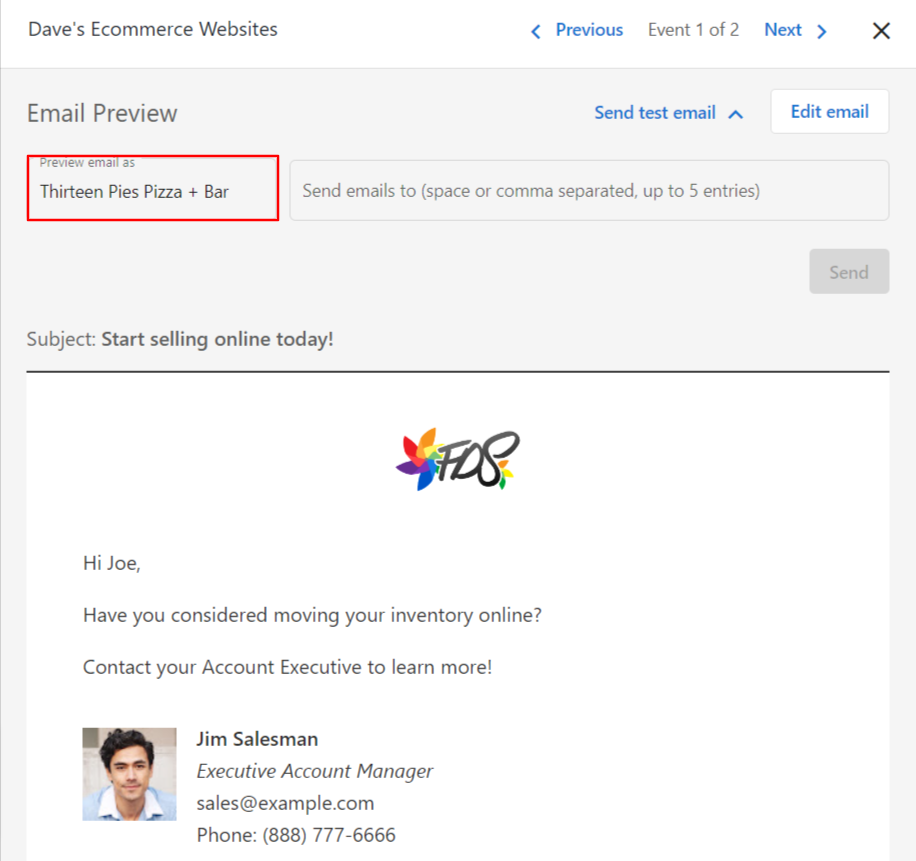
Send test email
- By default, the email will be previewed as a Generic account. To change this, click on the field and select an account that you'd like to preview the email as
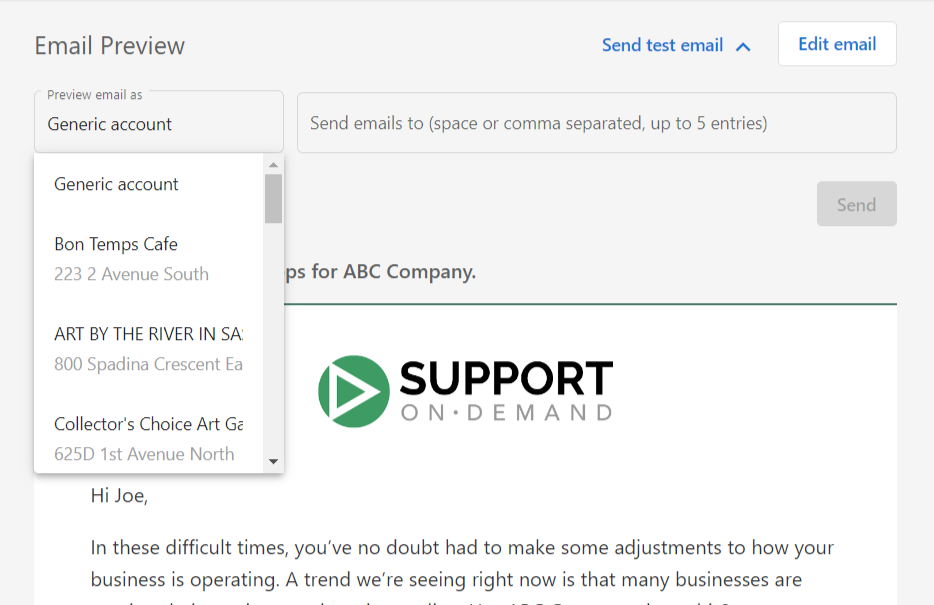
- In the next field, enter email addresses to send the preview. You can send to yourself or trusted reviewers
- Click
Send
The test email will be customized with the selected account's data, showing you exactly how dynamic content will appear.
Preview Limitations:
- The preview doesn't apply to recipient-based dynamic components (recipient names, phone numbers, email addresses)
- In test emails, you'll see generic information for contact fields, but recipients will see their real personal information
- This feature is not available when editing an email directly
Note: For test campaigns to send successfully, there needs to be an account linked to the user receiving the email.
Publishing and activation
For Campaigns:
Once testing is complete, click Publish to make your campaign available for sending.
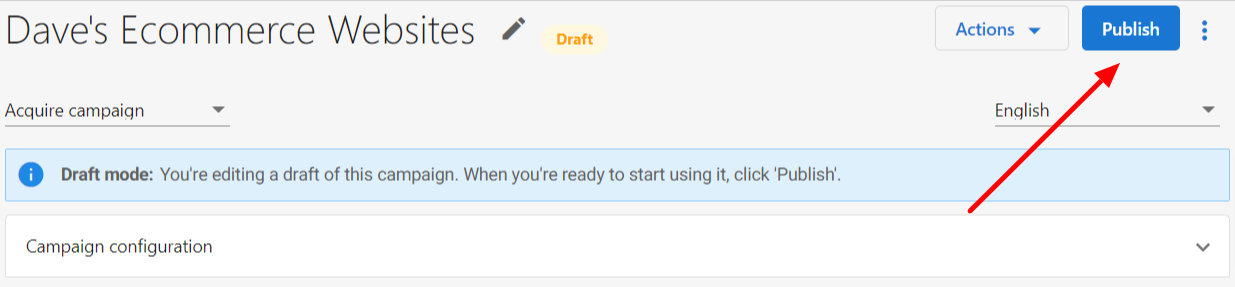
For Automations: Turn on your automation to begin trigger-based email delivery or use the "Manual" trigger to trigger the automation manually. Monitor initial sends to ensure proper functionality.
How do I fix common campaign issues?
Error: "Your company hasn't set up campaigns yet"
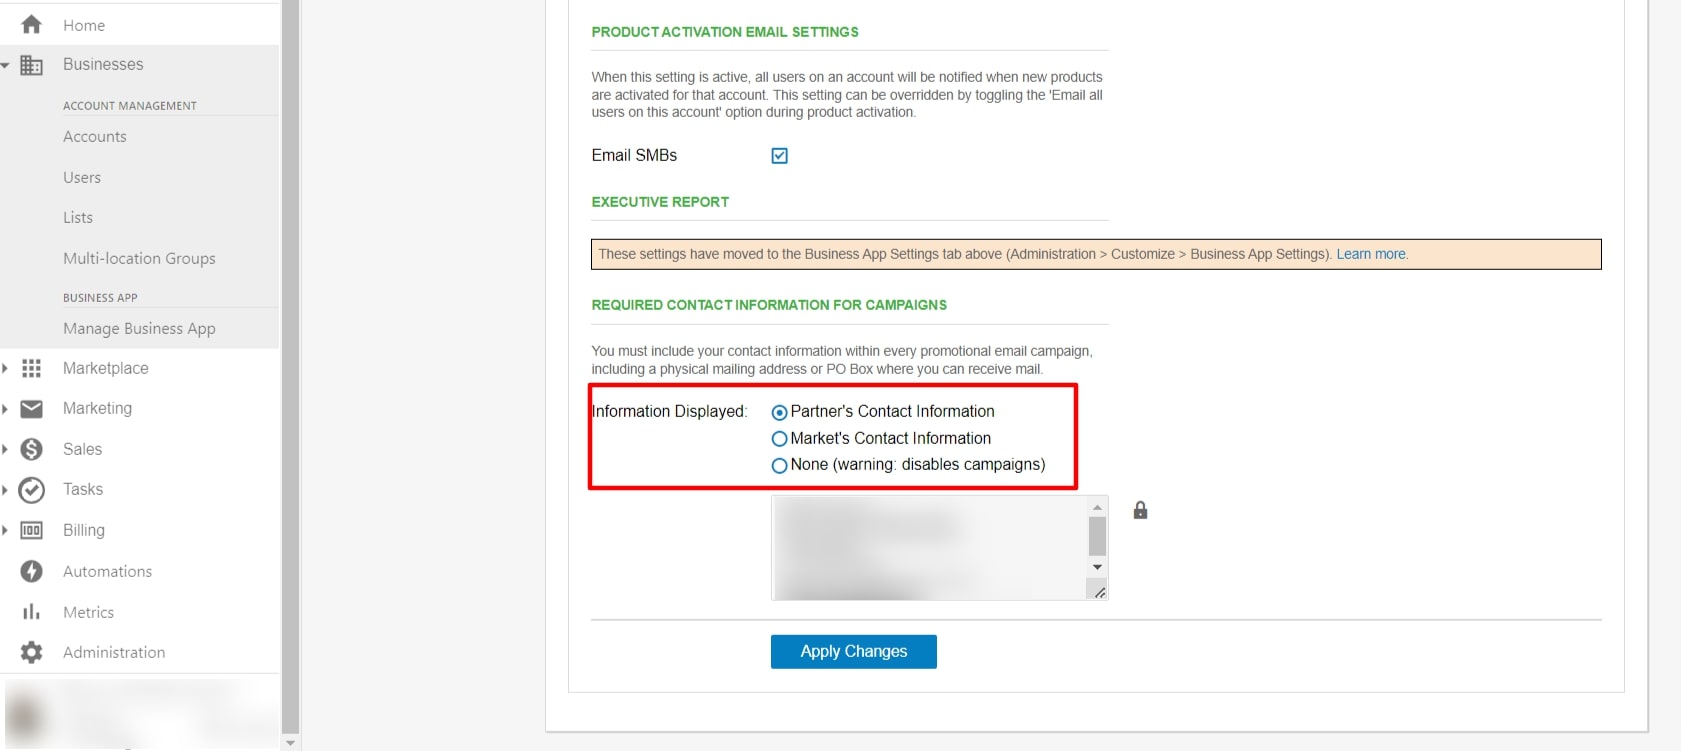
If you're getting the error "Your company hasn't set up campaigns yet. To use them, reach out to your administrator," this is because the required contact information for campaigns is not configured.
Why this happens: The contact information is required to send marketing campaigns. This error occurs when there is no contact profile selected to be used for the campaign (when "None" is selected, campaigns will be disabled).
How to fix it:
- Navigate to Administration: Go to
Administration→Customize→Market - Edit Market Settings: Click on the pencil (edit icon)
- Access Email Settings: Click the
Email settingstab - Configure Contact Information: Under Required Contact Information for Campaigns, select either:
- Partner's Contact Information - Uses your partner account contact details
- Market's Contact Information - Uses market-specific contact details
Video Walkthrough:
Other common setup issues
Campaign Won't Publish:
- Ensure all required email content is complete
- Verify that contact information is configured (see above)
- Check that campaign has at least one email event
Dynamic Content Not Working:
- Verify that CRM contact fields and CRM company fields are populated
- Test preview emails with specific accounts that have complete data
- Check that dynamic content syntax is correct
Frequently asked questions
Can I send a test email to someone other than myself?
Yes. When you send a test email from a campaign email's Preview, enter the test email address you want, or enter the email addresses of trusted reviewers when previewing as a specific account. For test emails to send successfully, there needs to be an account linked to the user receiving the email.
How do I change which day an email in my campaign sends?
Adjust the "days before starting" or "days before previous event" setting on the email in the campaign. The campaign must be in Draft status to allow editing.
Do the included days control how many times a campaign sends?
No. Included days set which days of the week emails can be sent, and emails are only sent Monday to Friday by default. The delays between campaign events count all days of the week, and an email scheduled for a day that isn't included is sent on the next included day.
What's the difference between a campaign and an automation?
Campaigns send scheduled, time-based email sequences at fixed intervals. Automations support drip sequences and also conditional logic that responds to contact actions, business events, and data changes.
Can I send the next email only when a contact clicks a link?
Not with a campaign, because campaigns don't support conditional branching or trigger responses. Use Automations instead, which can respond to contact actions such as email clicks.
What does rate limiting do in a campaign?
Rate limiting caps the number of recipients added to a campaign per salesperson per day when you add a list. It only affects the first email step, and pausing and resuming a campaign bypasses the limit.
How do I change the sender name and email address for campaigns?
Go to Partner Center → Marketing → Email settings. Change Sender name on the Sender and reply settings card and Email address on the Advanced email settings card, then click Save on each card.
Why does my campaign say my company hasn't set up campaigns yet?
The required contact information for campaigns isn't configured. Go to Administration → Customize → Market, edit the market, open the Email settings tab, and select either Partner's or Market's contact information under Required Contact Information for Campaigns.
Why isn't the contact's name showing in my email?
Verify that the CRM contact fields are populated and that the dynamic content syntax is correct. Test emails show generic information for contact fields, while recipients see their real personal information.