Acquisition Widgets overview
As of November 17, 2025, the Acquisition Widget is now a legacy Vendasta feature. We recommend using CRM Forms to automatically capture leads and fully customize nurturing automations (including Snapshot Report workflows). If you prefer a setup similar to the original Acquisition Widget, you can use the "Acquisition Widget" form template, which provides a comparable default configuration.
The Acquisition Widget is a lead generation tool you can embed on your website to acquire new leads. While browsing your website, your visitors can provide their contact information through this widget to see how their business is performing online or to try free products.
Once a visitor provides their details, you can configure the widget to perform the following actions automatically:
- Create a Snapshot Report
- Assign the visitor to a salesperson and send the salesperson a hot lead notification
- Add the visitor to a customer acquisition campaign
- Activate products, including:
- Reputation AI | Standard
- Local SEO
- Social AI | Standard
- Customer Voice | Standard
- Advertising Intelligence
- Website | Standard
- CalendarHero (Basic)
You'll be subject to the standard Snapshot Report and product fees for each account created with the widget.
The widget comes with a wizard that gives you the flexibility to customize the text, container design, and colors. You can set up a widget for every market you have.
How does the Acquisition Widget work?
To start using the Acquisition Widget, create a widget in Partner Center → Marketing → Acquisition Widgets. Then, embed this widget on relevant pages throughout your website.
When a website visitor submits their contact information, the widget will allow them to search for their business.
- If the lead finds their business, they can submit their information. The widget will automatically collect the rest of the details about their business.
- If the lead doesn't find their business, they will click Can't find your business? Click here. This option will take them to a form to provide their business details manually.
The assigned salesperson will then be notified so they can get in touch with the lead ASAP. Simultaneously, a new Snapshot Report will be created, the lead will be added to the customer acquisition campaign of your choice, and/or products will be activated (depending on your configuration)—allowing you to stay top of mind until they're ready to buy.
What's included
- Create and embed an Acquisition Widget – Step-by-step guide to creating, designing, and embedding a widget.
- Send a welcome email when leads sign up – Add a welcome email campaign to the widget so new signups receive it.
- Disable or turn off an Acquisition Widget – Remove the widget from your site and toggle it off in Partner Center.
Frequently asked questions
What changes are being made to the Acquisition Widget in Partner Center?
The Acquisition Widget has been sunset. Partners who signed up for a Vendasta subscription after November 17th, 2025, will not have access to the Acquisition Widget and should use the Forms feature.
The Acquisition Widget will no longer be available to new partners whose contracts begin on or after November 17, 2025.
Existing partners with contracts starting before this date will continue to have full access to create, edit, and deploy Acquisition Widgets within Partner Center.
All partners are encouraged to transition to Forms, which provides more modern functionality and full compatibility with current and upcoming AI features.
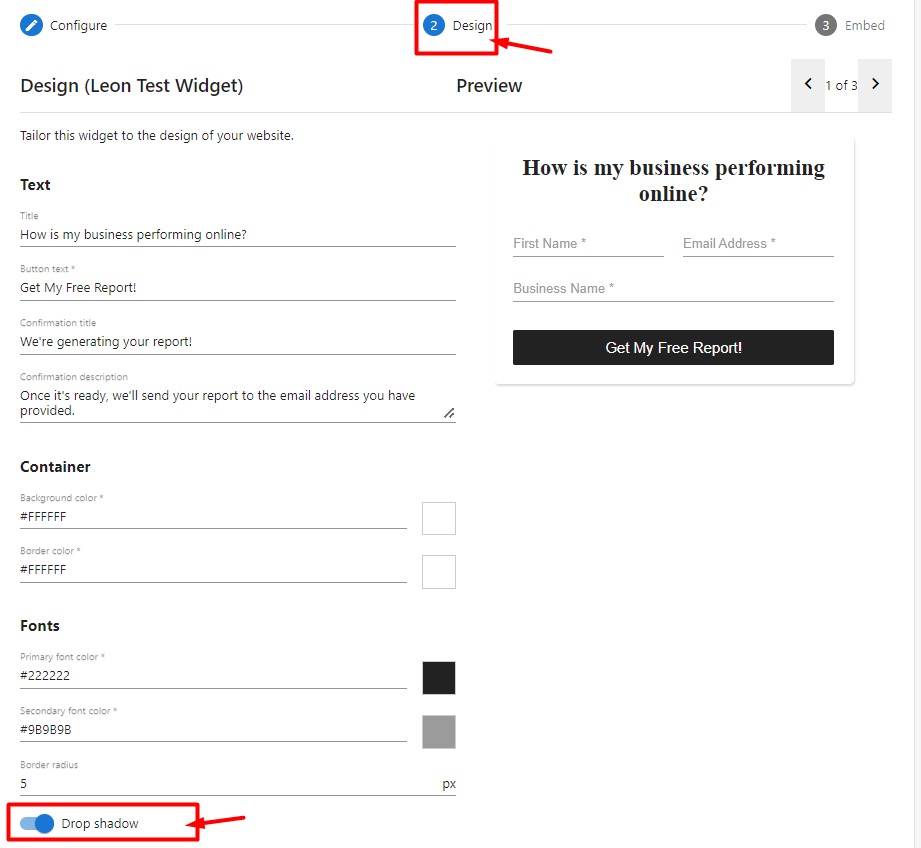
How do I enable or disable drop shadow for my Acquisition Widget?
- Log in to Partner Center.
- Go to
Marketing→Acquisition widgets. - Select a widget and go to Design (click Save and Continue at the end of the page).
- Scroll to Fonts and turn the toggle next to Drop shadow on or off.
- Click
Save & continue→Finish.
How do I embed the Acquisition Widget on a Wix site?
See Wix's help for adding a widget to a Wix site:
How do Automations work with the Acquisition Widget?
There is no direct link between Automations and the Acquisition Widget. You can create an automation that runs when someone submits through the widget by using a tag on the widget and an An account is created trigger filtered by that tag.
Configure the widget with a tag:
- Go to
Partner Center→Marketing→Acquisition Widgets. - Create a new widget or select an existing one.
- In the Tag field, enter a unique tag. When someone submits through this widget, the account will get this tag.
- Click Save and continue and complete the rest of the widget.
Create the automation:
- Go to
Partner Center→Automations→My Automations. - Create a new automation (use Blank template).
- Set the trigger to An account is created. Add a condition:
Account data→Tags→Include any(or Include all) → select the tag from the widget. - Save, build the rest of the workflow, and turn on the automation.
Can't find your tag in the list? Add the tag to an account first; once it exists on an account, it will appear in the list.
How can I test my Acquisition Widget code?
Copy the widget code and paste it into the HTML section of CodePen. This shows how the widget will look to visitors.
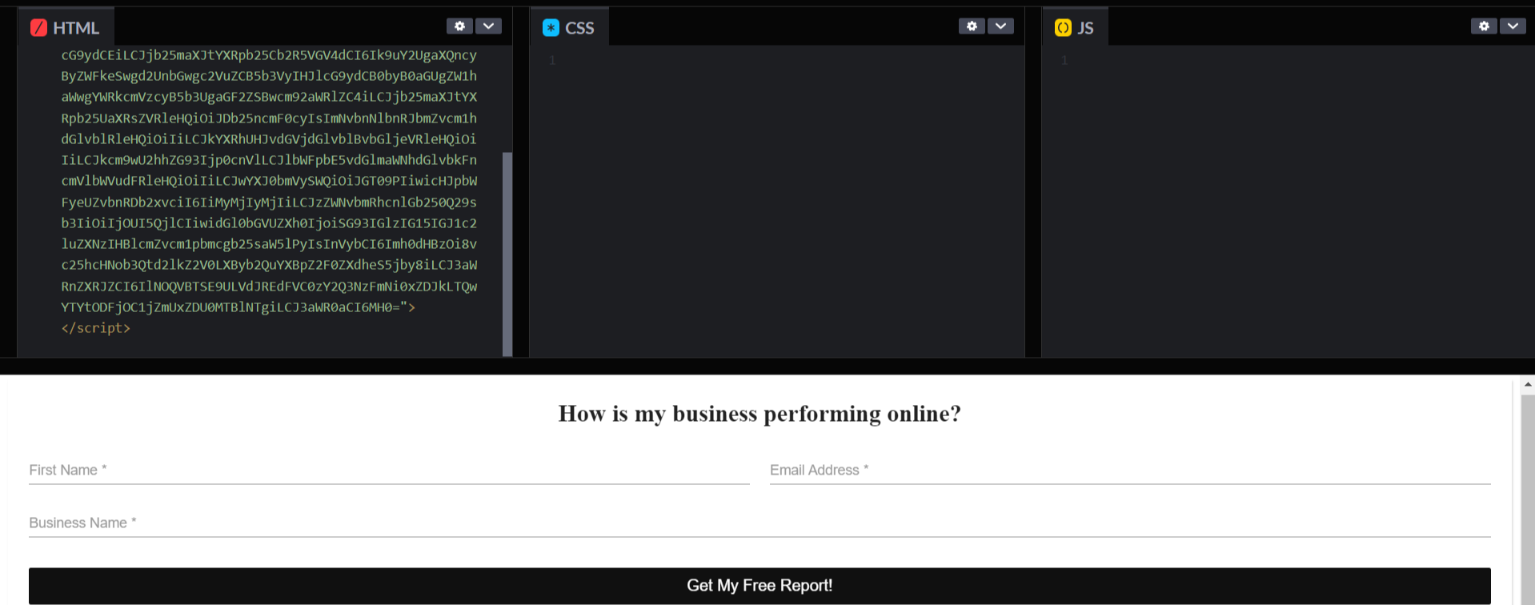
If nothing appears, the widget may be broken. Contact Support on Demand at support@vendasta.com.
How do I view and track leads from the Acquisition Widget?
When a visitor submits the widget, a new account is created and the lead appears in Partner Center → Sales → Prospects. Look for the Last Activity column — leads created through the widget are labeled Account Created via Acquisition Widget, so you can identify exactly which leads came from it.
Notifications: If only one salesperson is assigned to the widget, that salesperson receives a hot lead notification when a new lead submits. If multiple salespeople are assigned, leads are distributed among them and notifications go to the assigned salesperson.
Salesperson assignment: You set the assigned salesperson(s) in the Configure step when creating or editing the widget. You can assign one salesperson or multiple. If you assign multiple, leads are distributed in round-robin order.
Common questions:
- How do I know which leads came from the widget? Filter Prospects by the Last Activity label, or assign a unique tag to the widget — all accounts created through it will have that tag.
- Why didn't I get a notification? Notifications only fire when a single salesperson is assigned. If multiple salespeople are configured, check the assigned salesperson's notification settings.
Why didn't my campaign trigger when a lead submitted the widget?
Campaigns in Vendasta are contact-based — they require a contact record to fire. The Acquisition Widget creates an account-level record, not a contact, so campaigns don't trigger automatically when a lead submits.
Recommended workaround using Automations:
- Add a unique tag to your widget (in the Configure step). Every account created through the widget will receive this tag.
- Go to
Partner Center→Automations→My Automationsand create a new automation. - Set the trigger to An account is created, then add a condition:
Account data→Tags→Include any→ select the widget tag. - Add a step to enroll the account in the campaign of your choice.
- Save and turn on the automation.
Using a unique tag per widget lets you run different campaigns for leads from different widgets.
What's the difference between the Acquisition Widget and a Customer Voice contact form?
These two tools are designed for different audiences and different purposes — leads land in different places depending on which one you use.
| Acquisition Widget | Customer Voice contact form | |
|---|---|---|
| Designed for | Channel Partners capturing leads for their own sales pipeline | SMBs collecting inquiries from their own customers |
| Leads land in | Partner Center → Sales → Prospects | Business App (Customer Voice inbox) |
| Use when | You want website visitors to become leads in your CRM | Your SMB client wants a contact form on their website |
Bottom line for Channel Partners: Use the Acquisition Widget (or CRM Forms) to capture leads into your sales pipeline. If leads are appearing in Customer Voice instead of Sales Center, your site is using a Customer Voice contact form rather than an Acquisition Widget.