Navigating the automation canvas
Once an automation grows past a handful of steps, the canvas gets hard to scan — and the connections between steps become invisible, because dynamic content references steps by ID rather than by name.
The automation editor has three tools for this, in the toolbar on the right edge of the canvas. All three only change what you see: none of them alter the automation, and turning them on or off is never a change you need to save. They are available in both Partner Center and Business App.
| Tool | What it does |
|---|---|
| Search for steps | Finds and highlights steps matching a keyword |
| Step references | Draws lines showing which steps pass data to which |
| Minimap | Shows a scaled-down overview of the whole workflow, and jumps you to any part of it |
Search for steps
When editing a long automation, press Cmd+F (Mac) or Ctrl+F (Windows) inside the automation editor to open step search. Type any keyword — a step name, action type, or phrase like "email" or "update contact" — and matching steps are highlighted so you can jump directly to what you need.
- Search is case-insensitive
- Works across all trigger and action steps
- Use the arrow keys or Enter to move between matches, or click a highlighted step to jump to it
Step references
When a step uses dynamic content from an earlier step, the value is stored as a step ID rather than a step name — for example {.WorkflowStep.773dcc25-db4c-4d5d-882d-d3c8482e9770.response}. Opening that step later tells you a previous step is feeding it data, but not which one.
Step references answers that visually. Select the step references icon in the canvas toolbar — between the search and minimap controls — and the canvas draws coloured dotted lines between steps. Each line connects a step that produces data to the step that consumes it, with a different colour per source step so you can follow several at once. Select the icon again (Hide step references) to turn the lines off.
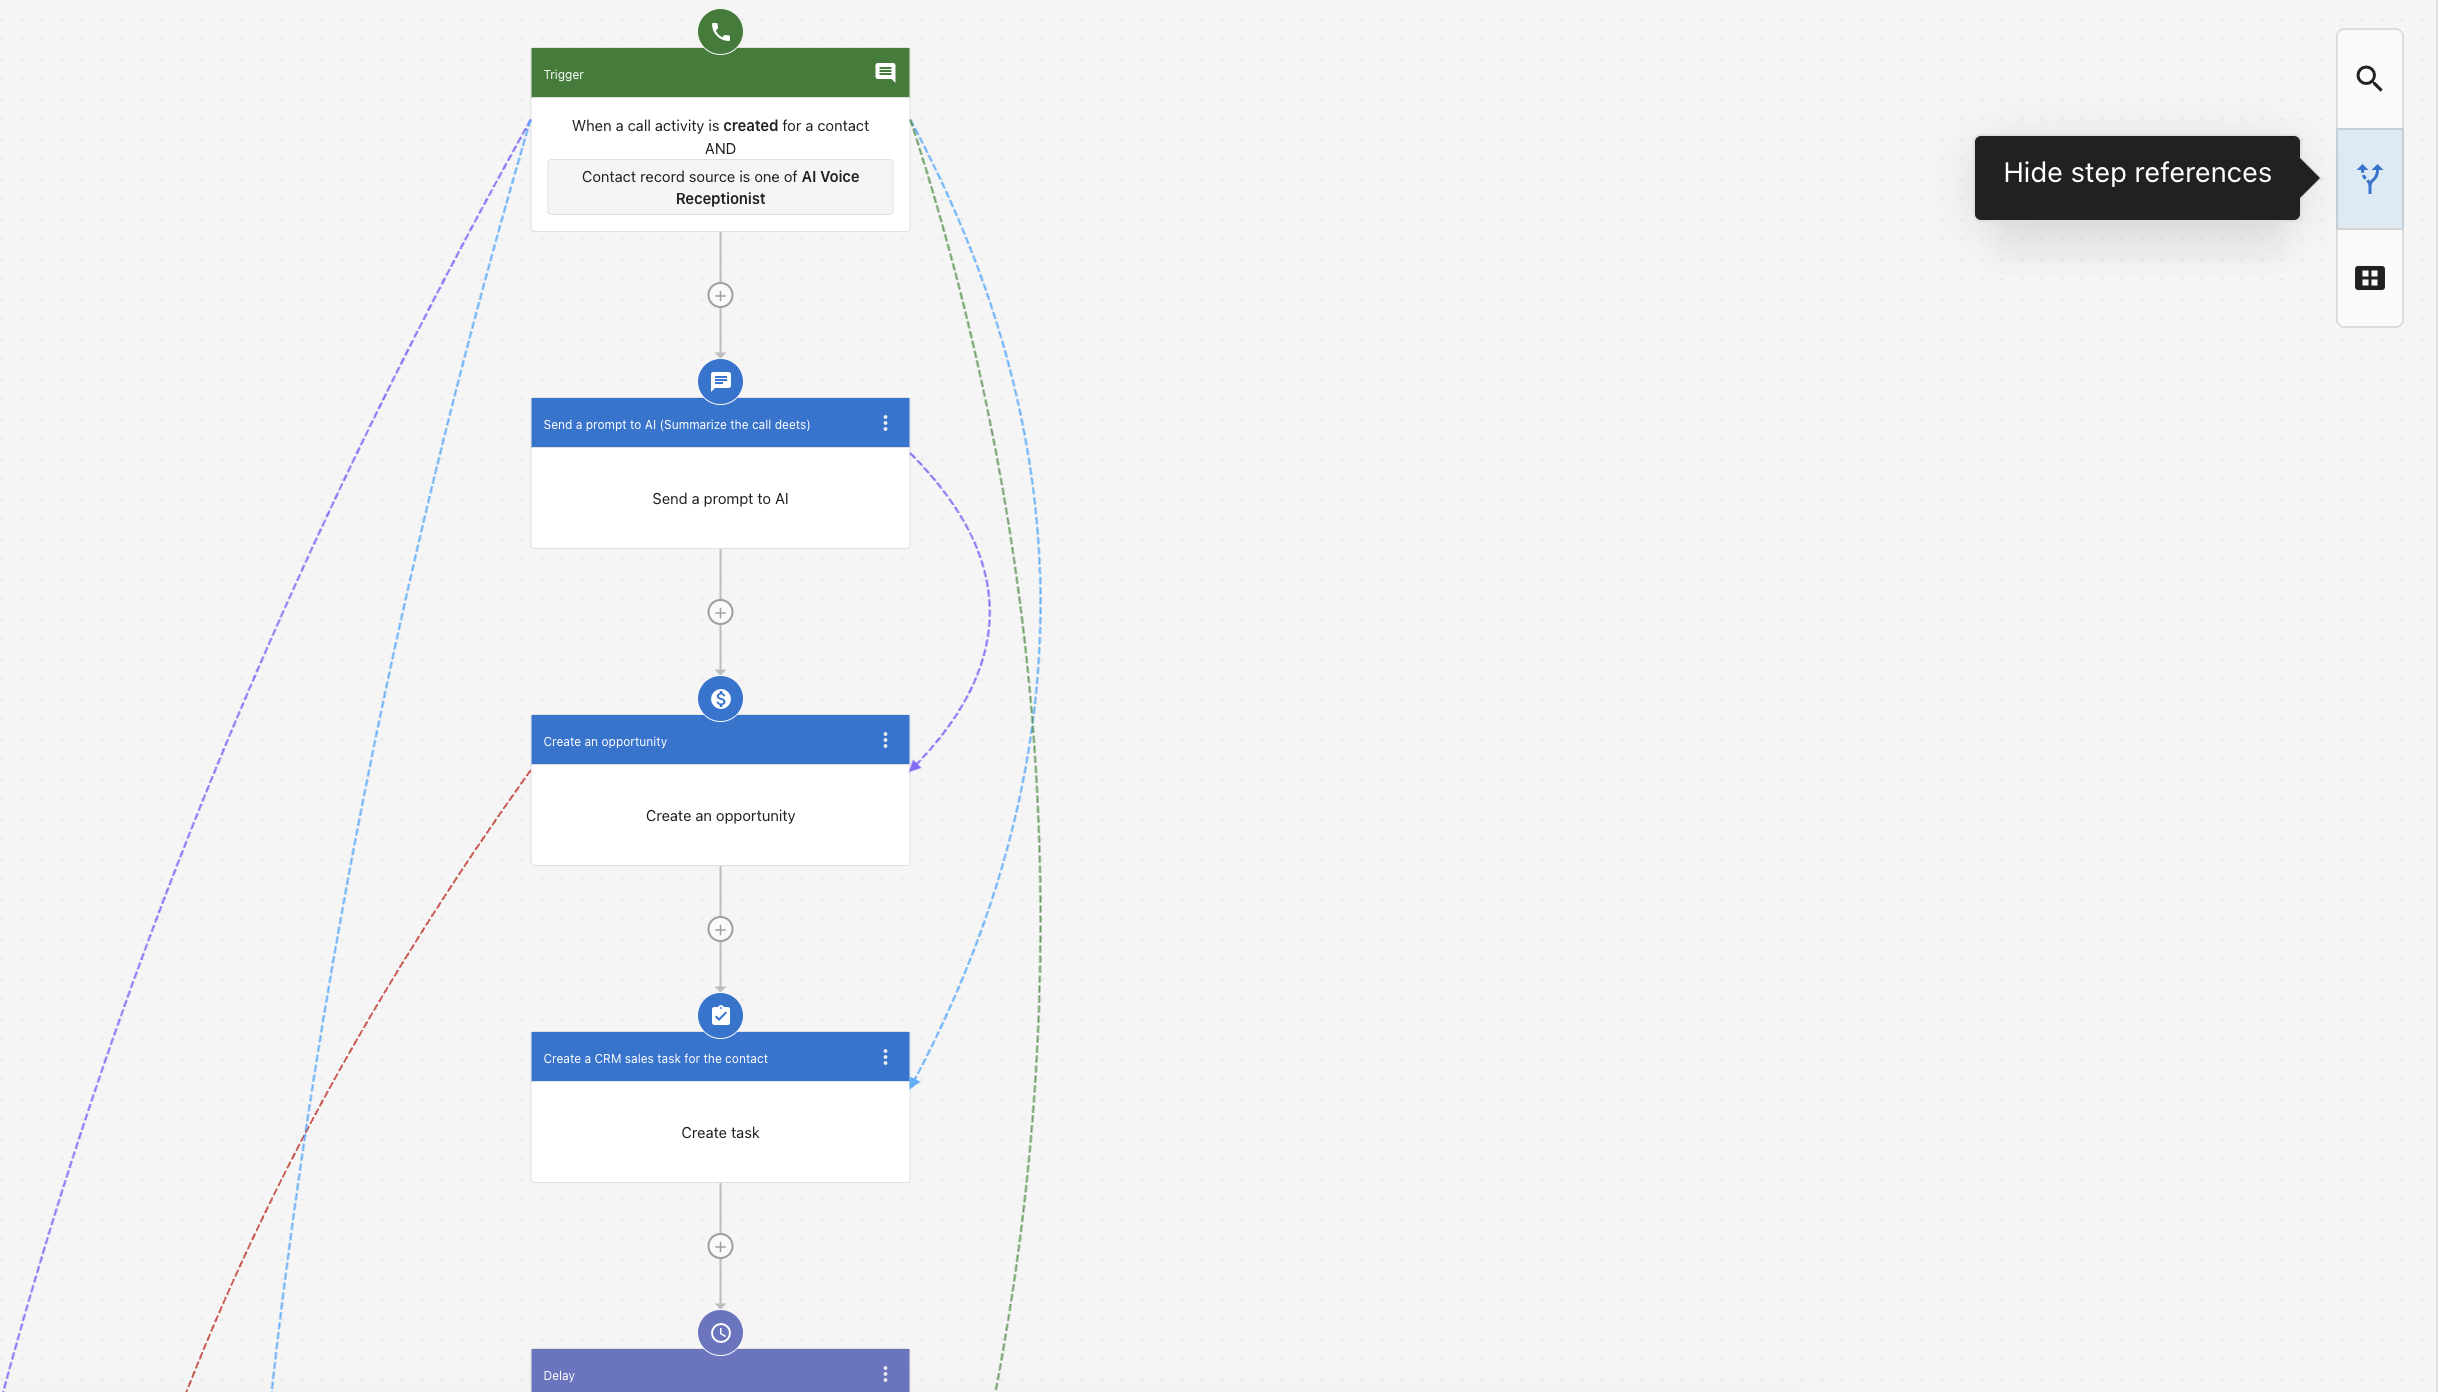
Use it to:
- Trace where a dynamic content value came from without opening each step in turn
- See what would break before you delete, move, or reorder a step
- Get oriented in an automation someone else built
Name your steps descriptively as you build. Step references shows you which step a value comes from; a clear step name tells you what that value is.
For the syntax behind these references, see Data expressions in automations.
Minimap
The minimap is a scaled-down image of the whole workflow, shown in the bottom-left corner of the canvas. A highlighted rectangle marks the part of the automation you are currently viewing, so you can tell at a glance where you are in a large automation.
Select the minimap icon at the bottom of the canvas toolbar to show or hide it (Hide minimap when it is already on).
Click anywhere on the minimap to jump straight to that section of the automation — far faster than scrolling across a wide, branching workflow.
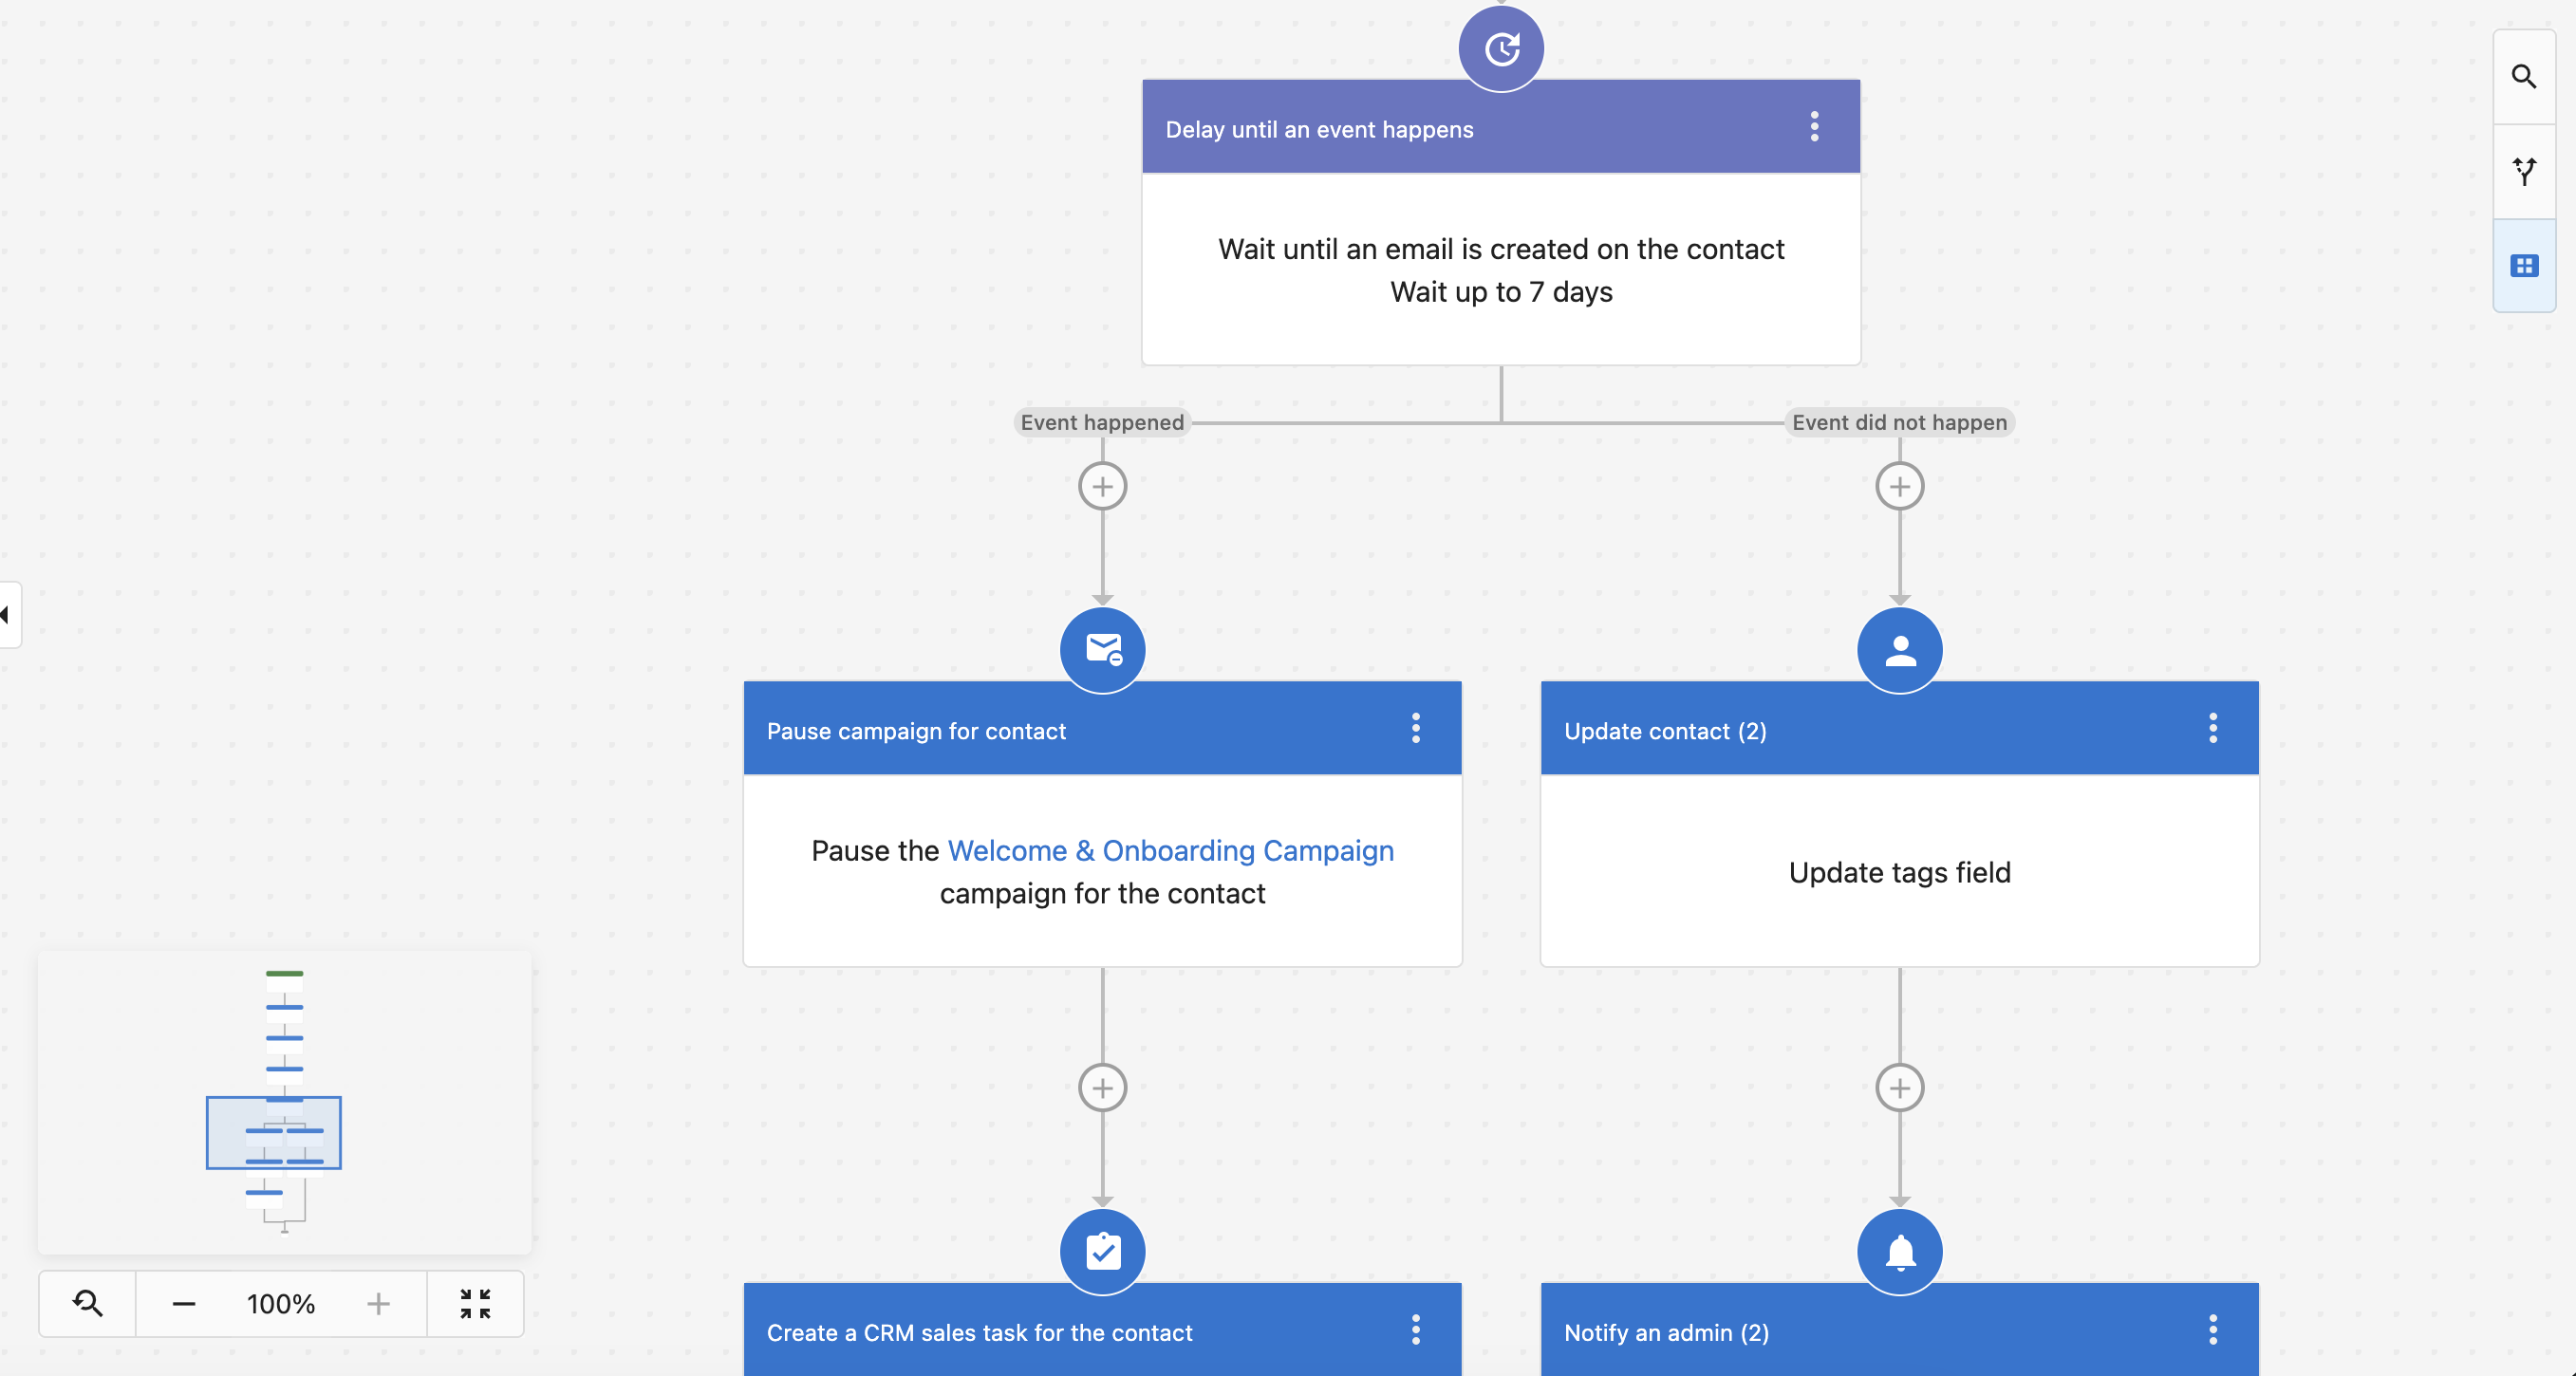
Alongside the minimap are the canvas zoom controls: use − and + to zoom out and in, or the expand icon to fit the entire automation on screen. Zooming out to see the full shape of a workflow and then clicking into a section on the minimap is the quickest way to move around a branching automation.
Learn more
- Creating and configuring automations — Build and configure workflows
- Data expressions in automations — Pass data between steps
- Advanced automation features — Logic steps, delays, grouping, and action sets