Time-based triggers
Run automations on a recurring schedule without waiting for an event to trigger them. The On a schedule trigger is useful for routine tasks like sending team reminders, weekly notifications, or monthly check-ins.
How time-based triggers work
Unlike event-based triggers that run when something happens (like a payment or account creation), time-based triggers run at times you define. You set the frequency, time of day, and date range, and the automation runs automatically.
Key benefits:
- Automate recurring tasks without manual intervention
- Run automations at optimal times for your recipients
- Set start and end dates to control when the schedule is active
Set up the On a schedule trigger
- Go to Partner Center > Automations.
- Click Create automation or open an existing automation.
- In the trigger selection, find Time-based and select On a schedule.
- Configure the schedule options (see below).
- Add your automation steps and save.
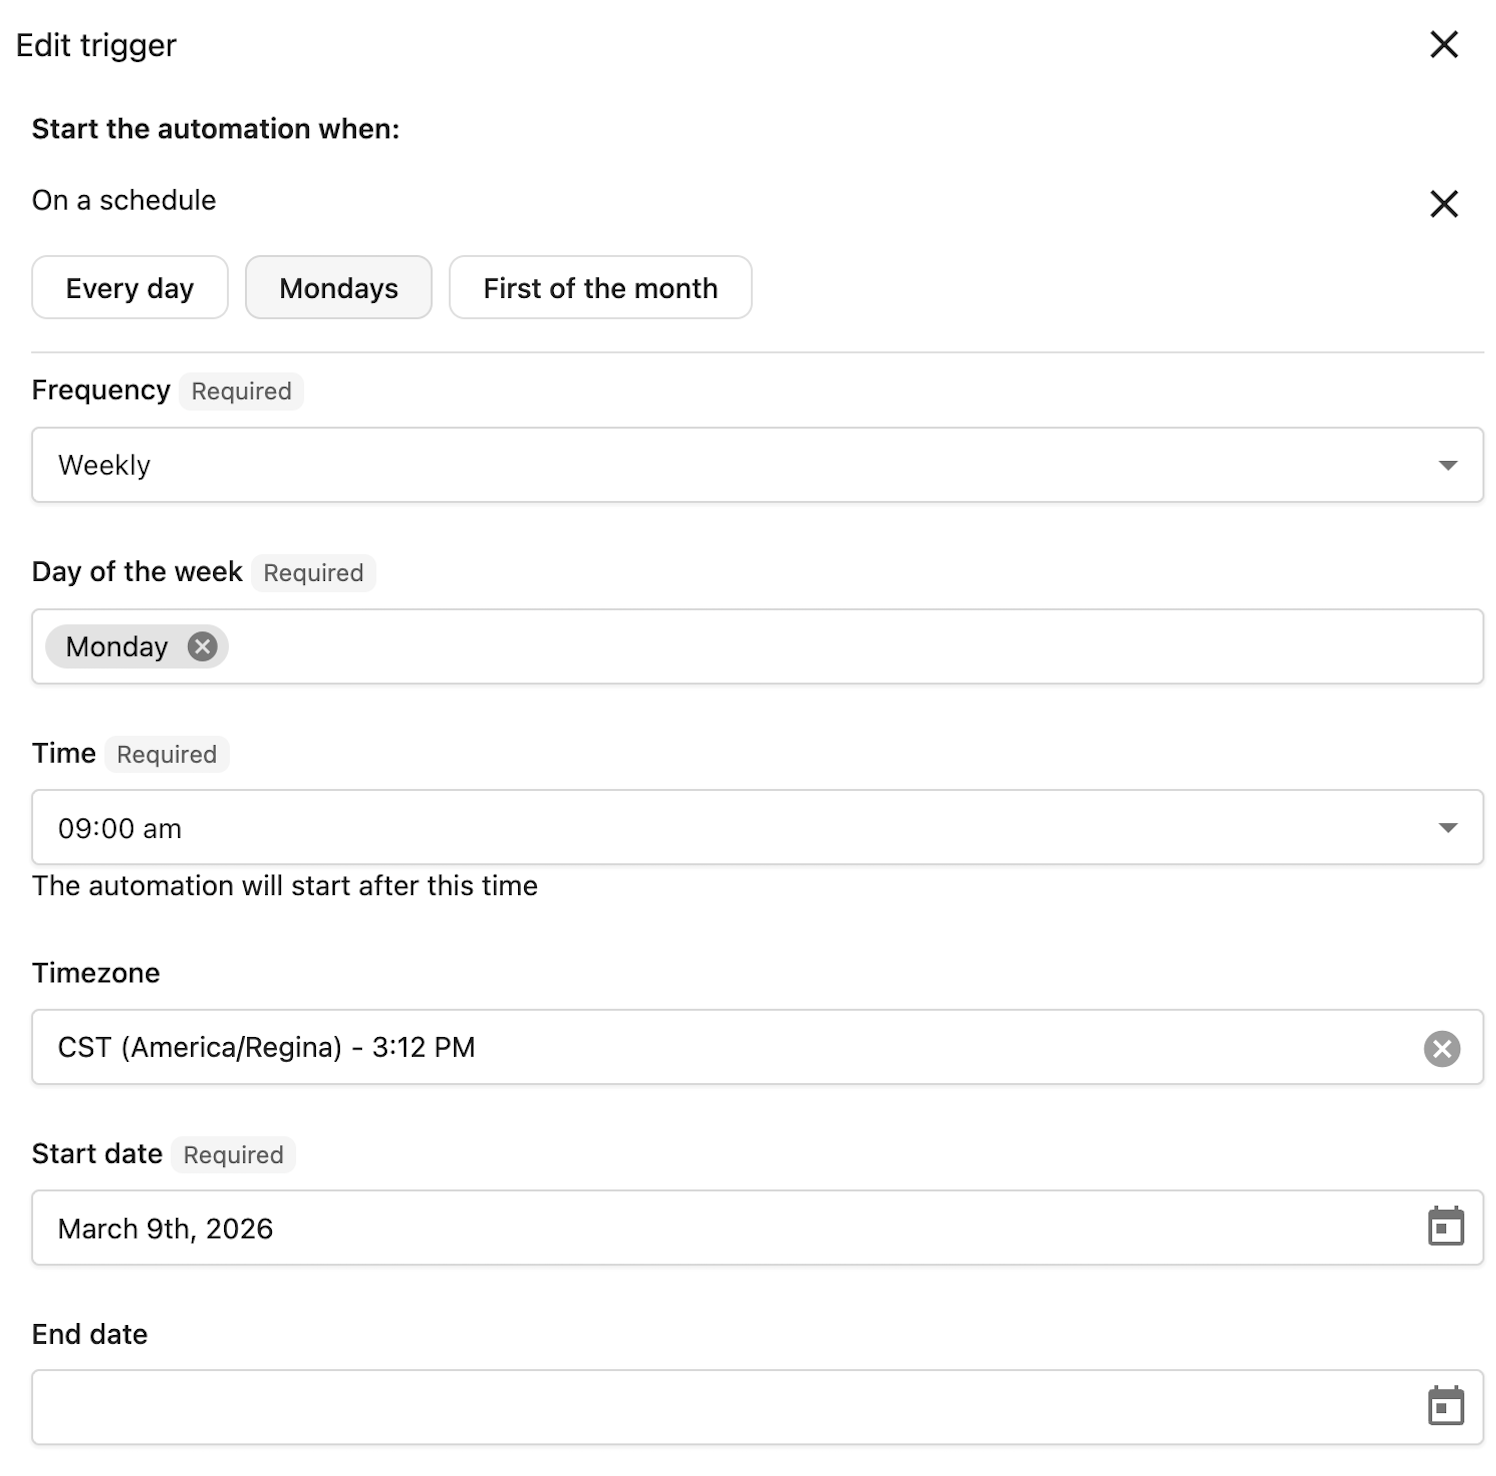
Schedule options
Daily
Run the automation at the same time every day.
| Setting | Description |
|---|---|
| Time | The time of day to run (in your configured timezone) |
Example: Send your team a daily reminder at 9:00 AM with a static link to review new orders.
Weekly
Run the automation on specific days of the week.
| Setting | Description |
|---|---|
| Time | The time of day to run |
| Days of week | Select one or more days (Sunday through Saturday) |
Example: Send your team a Monday reminder at 8:00 AM with a static link to the sales pipeline.
Monthly
Run the automation on specific days of the month.
| Setting | Description |
|---|---|
| Time | The time of day to run |
| Days of month | Select one or more days (1-31) |
| End of month | Run on the last day of the month, regardless of how many days it has |
Use the End of month option for consistent month-end notifications. This ensures the automation runs on the 28th, 30th, or 31st depending on the month.
Example: Send your finance team a monthly reminder on the 1st with a static link to the invoices page.
Date boundaries
Control when your time-based automation is active.
| Setting | Description |
|---|---|
| Start date | The earliest date the automation can run. The schedule becomes active on this date. |
| End date | (Optional) The latest date the automation can run. After this date, the schedule stops. |
Timezone
The schedule runs based on your automation's timezone setting. All times you enter are interpreted in this timezone.
Example use cases
Monthly invoice reminder for admin
Notify your admin to review outstanding invoices:
- Frequency: Monthly
- Day: 1st of each month
- Time: 9:00 AM
- Steps: Send a notification to admin with a link to the invoices page
Weekly sales task for client check-ins
Create a recurring task to reach out to a key client:
- Frequency: Weekly
- Day: Wednesday
- Time: 10:00 AM
- Steps:
- Find the contact
- Create a sales task to check in with the client
Invoke an AI employee on a schedule
Invoke an AI employee to generate a job and share them with your team:
- Frequency: Daily
- Time: 8:00 AM
- Steps:
- Send a request to an AI employee with your prompt
- Send a webhook and configure it to send to Slack or Google Chat
Troubleshooting
Automation didn't run at the scheduled time
- Verify the automation is turned on (running state)
- Check that the current date is within the Start date and End date range
- Confirm the timezone is set correctly in automation settings
Schedule options not appearing correctly
- Ensure you've selected at least one day for weekly or monthly frequencies
- For monthly schedules, remember that selecting day 31 only runs in months with 31 days
Automation runs at unexpected times
- Double-check your timezone configuration
- Remember that daylight saving time changes may affect the actual run time in your local time