Add SPF, DKIM, and DMARC records (cPanel Namecheap)
This guide will walk you through the process of adding SPF, DKIM, and DMARC records to your domain using cPanel with Namecheap as your domain host.
Before you begin
To follow this guide, you will need:
- A domain purchased through Namecheap
- Access to your cPanel account
- The SPF, DKIM, and DMARC record values provided by your email service provider
Adding DNS records in cPanel
Step 1: Log into your Namecheap account
Start by logging into your Namecheap account at namecheap.com.
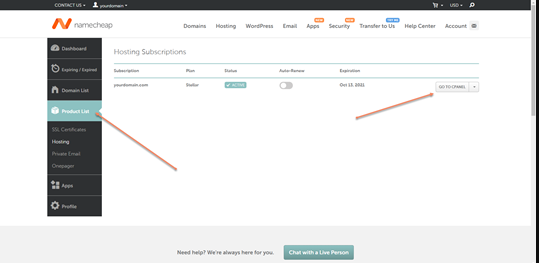
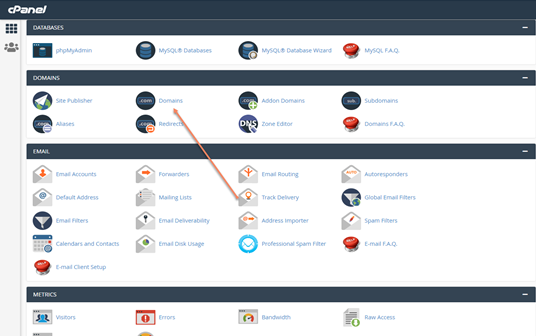
Step 2: Access cPanel
- Navigate to
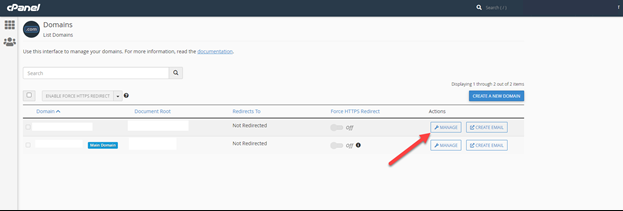
Domain Listin your dashboard - Find the domain you want to modify and click
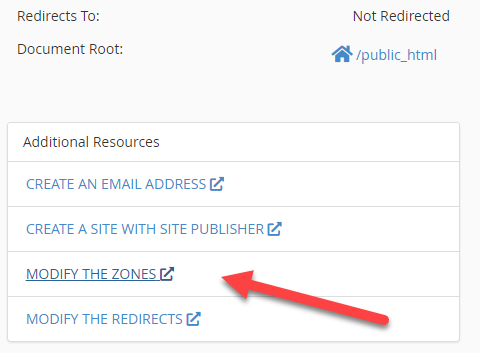
Manage - Select the
Advanced DNStab
Step 3: Add SPF record
The SPF (Sender Policy Framework) record helps prevent email spoofing by specifying which mail servers are authorized to send email from your domain.
- In the
Host Recordssection, clickAdd New Record - Select
TXT Recordfrom the dropdown menu - For the
Hostfield, enter @ (representing your root domain) - For the
Valuefield, enter your SPF record (typically looks likev=spf1 include:_spf.mailgun.org ~all) - Set TTL (Time to Live) to
Automatic - Click
Save Changes
Step 4: Add DKIM record
DKIM (DomainKeys Identified Mail) adds a digital signature to your emails to verify they haven't been tampered with.
- Click
Add New Record - Select
TXT Recordfrom the dropdown menu - For the
Hostfield, enter your DKIM selector (often provided by your email service provider, e.g.,mail._domainkey) - For the
Valuefield, enter your DKIM value (typically a long string beginning withv=DKIM1;) - Set TTL to
Automatic - Click
Save Changes
Step 5: Add DMARC record
DMARC (Domain-based Message Authentication, Reporting & Conformance) tells receiving servers what to do with emails that fail SPF or DKIM verification.
- Click
Add New Record - Select
TXT Recordfrom the dropdown menu - For the
Hostfield, enter_dmarc - For the
Valuefield, enter your DMARC policy (e.g.,v=DMARC1; p=none; rua=mailto:dmarc@yourdomain.com) - Set TTL to
Automatic - Click
Save Changes
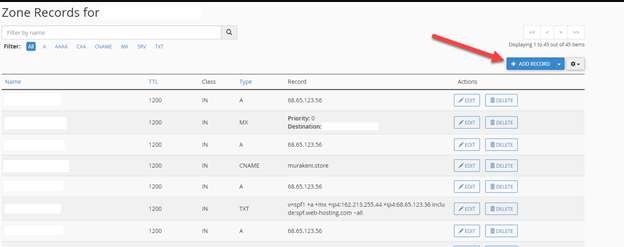
Step 6: Verify your records
After adding all your records, your DNS management page should show all three records (SPF, DKIM, and DMARC) as shown below:
Troubleshooting
If you encounter issues with your email authentication after setting up these records:
- Check that the records have propagated (can take up to 48 hours)
- Verify there are no typos in your record values
- Use an online SPF/DKIM validator tool to check your configuration
- Contact your email service provider for assistance
Additional tips
- Start with a cautious DMARC policy (
p=none) to monitor without affecting email delivery - Regularly check your DMARC reports to ensure everything is working correctly
- Consider increasing your DMARC policy strictness (
p=quarantineorp=reject) after confirming proper setup

Next steps
After successfully setting up your SPF, DKIM, and DMARC records, you should:
- Test your email delivery to ensure everything is working correctly
- Set up a system to receive and analyze your DMARC reports
- Gradually increase your DMARC policy strictness as you gain confidence in your setup
By properly configuring these authentication records, you'll improve your email deliverability and protect your domain from being used for email spoofing.